Troubleshooting Chalk Gesso
December 14, 2010
The first time I began creating paintings on panels using chalk gesso I had no problems. I read the manuals, ordered the materials from a good supplier in NYC and proceeded to create my panels. No problem. It was summer in Connecticut. 30 years on, the paintings I created from those panels are still alive and well.
Over the years, with other batches both in sunny, dry, warm California and later in Germany (also in the summertime), I had no problem. My batches were done using rabbitskin glue sourced from my American art suppliers (Utrecht in NYC or Bay City in SF) or later Kremer pigmente in Munich. Now, after moving to Bruges, I’m back to creating new batches of gessoed panels. But why am I experiencing such difficulty with my gesso? How strange to find myself returning to square one with what should be a relatively simple process. So, I’ve decided to document my trials and errors – for myself and internet posterity. There may be others out there who have experienced similar problems?
The problem:
My assembly process would begin normally, but as I proceeded to build up layers, the gesso would no longer flow but rather glom onto the panel. The brush would stick, the gesso would glob. When dry, a little sandpaper would remove far too much pigment. So it was clear: there was a problem with my glue.
Troubleshooting:
I generally create my panels in the wintertime. Nothing to be done about that. The house is radiator heated, that’s got to be better than whatever (winter) conditions Cennini ever experienced. We live next to a canal in an older house that does not contain double glazed windows, so it might be more drafty and moist than many modern environments, still, creating good gesso panels should be possible.
Double boiler? Yes, of course. Did the glue boil? No. Never. But after the gelatine melts, what is the threshhold temperature which spoils the glue? I researched temps on the internet and found 52° Centigrade to be the most generally noted gauge. But is that true? From my experience, it depends on the source, as RS can vary a great deal. At this point, I would not go by numbers but rather my own eyesight.
For example, a few years ago I bought a new batch of glue from my local art dealer, a man who specialized in esoteric artists materials. It seemed OK at the time but then the problem began to recur. Does RS have a shelf life? Or did I let the glue “cook” too long? I had purchased a meat thermometer and kept my temp well below 52°. Still, invasion of the glom.
For my most recent batch I used the last of my old RS from the esoteric art supply store. When I added the pigment, the paint became very granular and unattractive. I guess it does have a shelf life (even though it did not smell)… So I threw it out.
Then used the RS that I had purchased recently from Kraemer Pigmente. Little crystalline pebbles, very nice. When I ran out of the Kraemer RS (silly, I had only purchased a 100 G test amount), I bought a new batch of glue from my local art supply store (brand, Senellier). This stuff comes in pellets similar to the scat of small animals that you might find in a forest. (I prefer the Kraemer) But for both glues, I soaked them overnight (80 G RS to 1 liter of water), melted, cooled and did the finger-pressure-crevice test. So far, so good. (Though the Kraemer RS seemed firmer, clearer, less cloudy, more uniform and refined.)
I bought an electric warming plate at the local Kringwinkel (Salvation Army). It holds food warm but doesn’t cook it. 40° Centigrade or so but not higher. Great, I thought. But still, when I kept the glue-pigment in that double boiler pot for a few hours, the glue lost its strength. Oooops.
*Update from 2019. I coated about 50 small panels in traditional chalk gesso in my studio July-August 2019. I was extremely careful to melt the rabbit skin glue, add the calcium carbonate (with 10% titanium white) and create a thin creamlike consistency of my gesso. I kept it in a large jar in a double boiler bath. As soon as the glue melted and achieved the right consistency, I would remove it from the heat. I worked quickly to cover my (3 mm HDF) panels front and back, so was intent on completing the 10 thin coats in one day’s working session. I reheated my gesso as necessary (when the RS glue began to thicken) but was careful to not let it “cook”. My panels turned out fine. I’m thinking that the problems I had before were due to in attentiveness on my part. I must have allowed the glue to sit too long on the heat, adversely affecting the integrity of the RS glue. Also, completing the panels in one day’s working session insures the right amount of evaporation to contribute to the binding of one coat to its successor.
Bottom line:
- Buy the best grade of RS that you can find from an archival artist’s materials supplier (like Kraemer).
- Do the crevice test, if you want, but be sure to take it off the heat as soon as it fully melts.
- Add your pigment in the center in a stream, allowing it to gently absorb the glue and sink via gravity.
- Stir thoroughly but not vigorously.
- For uniformity, do your gessoing in one session (one day).
- Rabbitskin glue is an organic substance, containing all the resilience and receptivity of living matter, as well as it’s limitations.
Oils
May 26, 2009
Most books advise a beginner to begin with oils as it is more forgiving. It is easier to correct a mistake for example, than with watercolor. That may be true – especially if one uses opaque pigments – but oils, by nature of the medium itself, are viscously translucent, thus understanding their innate capacity to transmit light through a clear film is ultimately critical for both succesful manipulations of form without pentimento as well as transmission of light. Eastlake noted, in referring to Jan Van Eyck, “The leading attribute of the material of oil painting, as distinguished from those of tempera and fresco, viz. its power to transmit light of an internal surface through superimposed substances more or less diaphanous…”.
There are two main approaches to painting in oils, alla prima and indirect. Although much art is created as a mixture of the two approaches, in themselves they are distinct. The contemporary art world relies quite heavily upon directly percieved and expressed imagery, thus an “alla prima” approach is emphasized. Information on the indirect methods of painting is out of style, so you have to search for it. More and more sites, blogs and forums continue to pop up on the internet. Here is one site I have found that is a fine, yet relatively dis-interested treasure trove. There are others.
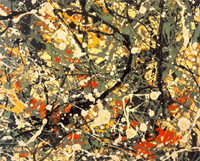
Jackson Pollock Abstract Expressionism
Alla prima essentially means executed in one session as exemplified by Jackson Pollock in his drip paintings. There can be no argument against this method of approach as both its demands and results can be superlative. After all, if a painting has any chance of reflecting the evanescent truth of the moment, it needs to be created in the same spirit, with a Zen-like accuracy and intensity.

the Mona Lisa
What then are the values or possibilities of a more indirect technique? Does a laborious technique result in a tedious and heavy painting (it often does!)? Can a painting developed indirectly still retain the freshness of the moment? If so, then how? Thus, for those who feel themselves drawn to an indirect method, the knowledge of ancient techniques is extremely helpful. Indirect painting simply means developing an image through a series of manipulations over time and calculated to achieve a particular result. A further refinement of the indirect painting technique is the mixed technique. Both allow for a methodological layering which in itself creates optical effects of great beauty and luminescence. Subject matter aside – what can be more eternal than that?
Encaustic
May 26, 2009
Encaustic:

portrait in encaustic
Interestingly, encaustic or hot wax painting, was known to be one of the major creative techniques used by the ancient Greeks. The Egyptian tomb portraits, which are some of the finest examples of encaustic portrait painting available today, were (according to Ralph Mayer) done by Greeks (not Egyptians). In recent times Jasper Johns has used the technique with a great deal of success in his series of images of the American flag. It is a technique that traditionally requires alot of cumbersome tools. Today the process has been streamlined with simpler tools but for purity, simplicity, and honesty’s sake I will try to describe the technique that I have used.
The Ground:
The Greeks reportedly used encaustic on walls and panels. A revival of the technique in the 18th/19th century concentrated mostly on mural painting – with reportedly insubstantial results, now 200 years later. My own experience has been entirely on wooden panels, prepared with traditional chalk gesso (the same treatment that is used for egg tempera).
Tools:
As the medium is melted beeswax, the first tool one needs is a pallette for mixing the colors in a molten state. Years ago, I went to my local metal junk yard and commissioned a pallette measuring 18″ x 28″ of 1/4″ steel plate welded on four sides by legs 5″ high (also of 1/4″ steel plate). This pallette then sat on top of a hot plate with an air space of approximately 2″. At the time, I remember it cost me about $10. The second tool one needs is a hotplate. The best are the kind that allow for variable temperature adjustments. A quick search at the local flea market should offer what you need.
Materials:
The same dry pigments that can be used for egg tempera can be used in encaustic. Purchase a few blocks of fine beesawax. Melt some wax and mix it with approximately 20% damar varnish crystals by volume. Mix this molten fluid together with a similar amount of dry pigment and keep it in a metal cup on the warmed pallette. Mix up a few colours as needed for the project at hand and keep them warm on the pallette. These days encaustic sticks can be purchased with the resin/oil component already mixed in. Your choice.

encaustic flag by Jasper Johns
Painting:
Molten colors can be applied using bristle brushes or even the pallette knife. As the paint hardens almost immediately upon contact with the panel, expect a highly textured, immovable result. [My original experiments were done outside in the hot humid summertime, so setting time worked slightly to my advantage.]
Burning In:
Further manipulations can be obtained by heating the panel surface with a heat lamp. Be careful to keep the surface horizontal to avoid runs. The final “burning in” is also done with a heat lamp close and evenly rotated over the surface to achieve a final fused result. In this way heavy impasto effects can melt into thin, veil like veneers.
There are some other resources for encaustic. The University of Delaware’s MITRA forum is an invaluable reference for artists on all things technical. Notebook is another. These days there are many blogs dedicated to the arts and crafts practice of encaustic. They can provide useful tips and tricks but, of course, it’s best to always do your own research by consulting tried and true technical manuals, like Reed Kay’s, The Painters Guide to Studio Methods and Materials. Englewood Cliffs, NJ: Prentice-Hall, Inc., 1983.
Egg Tempera
May 25, 2009

Egg tempera Medici Portrait by Botticelli
Egg tempera is an time tested technique, especially well loved by panel and icon painters. It renders flat graphical shapes and fine precise detail quite well. Softer gradual modulations are possible but take practice and patience. The unvarnished final work has an almost chalk-like finish to it. This technique formed the backbone-skill to any medieval or renaissance painter’s tool chest. The twentieth century has witnessed its revival with Andrew Wyeth being perhaps its most famous spokesman.
For anyone wishing to ask experts geeky questions about the medium check out the MITRA forum. In the past there has also been the Society of Tempera Painters (whose informative forum is currently offline). The Tempera Society had a well established site and forum, documenting many aspects of the process as well as related techniques. In its absence, I’d suggest picking up a good book and starting in. The online version of Daniel Thompson’s, The Practice of Tempera Painting is one of the most extensive sources around. Cennini is charming even if a bit antiquated in his terminology and procedures. If you are looking for something more general in order to get started, try Ralph Mayer’s “The Artist’s Handbook of Materials and Techniques”, Reed Kay’s “The Painter’s Guide to Studio Methods and Materials”, or “The Materials of the Artist and Their Use in Painting” by Max Doerner. All are tried and true comprehensive source books for the craft of painting.
Egg tempera is a paint made from an emulsion of oil and water. The final paint film is not as flexible as oil. Thus, to avoid cracking, the painting is executed on a firm and stable panel not on a stretched canvas. At the moment, I use egg tempera primarily as an underpainting. The links here on the right offer some info – by no means extensive – about how I prepare my gesso and panels.
Pigments:
Be sure to supply yourself with a good collection of dry pigments – avoiding poisonous materials whenever possible. You don’t want to breathe in toxic dust. By grinding your own paints you get to know the specific characteristics of each pigment – opacity/translucency, saturation, hydrophobic or philic, chromatic nuance. Online suppliers are very helpful if you do not live in a large city with a big art supply store. Get a thick piece of frosted plate glass and a glass muller. Otherwise a pallette knife and wooden painter’s pallette can suffice in a pinch. Grind up a small amount of each pigment you want to use in distilled water, making a smooth paste. The pastes can be stored in plastic film containers for short periods without drying out. To extend that drying out time I usually insert a piece of sponge at the top of the jar. Keeping it moist prolongs the life of the pigment paste.
The Egg:
Locate as fresh an organic an egg as you can. Crack the shell carefully in half without breaking the yolk. Carefully move the yolk between shell halves to isolate the yolk from the white (all the while protecting the egg yolk membrane from puncture). Let the white albumen drip away. Pass the yolk back and forth between the palms of the hands in order to dry it off. Roll it across a piece of absorbent paper towel for further drying. Eventually you should be able to pick up the yolk by it’s sac. Hold it over a small clean jar (empty jelly jars from hotels are great for this) and pinch the bottom. The pure yolk will drip out. Add an equal amount of distillled water, cap, and shake it. Store in the refridgerator.
Tempering the Paint:
On your glass palette add equal amounts of pigment paste and egg yolk. I use a palette knife to measure a “bean” of pigment paste and a small pipette to measure the same by dipping into my prepared egg. Mix until smooth. If you have already ground up your pigments in distilled water, then adding the egg binder now is easier and requires much less grinding. Some pigments will require more yolk, others less. To make sure you have tempered your paint correctly, Take a moistened sable brush, dip it in your newly mixed paint and lay a stroke on a nearby piece of window glass. It should dry quite quickly. Then take a one-sided razor blade and gently scrape the paint swash off. It should maintain its own consistency and curl off like a ribbon. If you have not added enough egg the pigment will return to powder and flake off. If you have added too much egg the paint film will lack chromatic saturation. Let experience be your guide. Soon you will get the knack of it.
When you are satisfied that you have tempered your paint correctly, transfer this mixture to a painting cup. I use a nested set of porcelain dishes that have a top cover. The tempered paint is rather thick, too think for painting, so at this point it is important to add additional water in order to arrive at the right mixture of pigment/yolk. How much water? Apparently, that doesn’t really matter. If your paint has been tempered correctly you can (if you wish) dilute it with large amounts of water so as to paint with many fine watercolor-like washes. As you work, it may seem as though the color is not building, but be patient and you will see that it does.
Painting:
Sable brushes dipped in this watered down paint will be too saturated for the painting stroke. Using your thumb and forefinger press the excess liquid out until the brush renders a clean full stroke without leaving behind a blob of paint at the end of the motion.
Egg tempera does well with many light thin strokes. Do not immediately rebrush a stroke. Let it dry, then add another level. Because it dries so quickly this is usually not a problem at all. In this way soft transitions can be achieved. But is is important to let your brush dance over your whole painting. Do not obsess in any one area, if it has not thoroughly dried it can become overworked and lift off earlier levels of paint, creating a hole that is difficult to repair. Stay light and playful, attentive to the whole work. Each artist decides how to use this medium to his/her own ends.
Value Study
May 12, 2009

Langerei North value study
I spent years dragging my portable easel out to inspiring locations to paint. Although I managed to create a few interesting paintings, I threw away just as many failures. The changes of season, weather, and light caused any particular landscape to fluctuate enough so that I ended up with mud more often than not. Thus, I had to ask myself, how is it possible to capture anything eternal about what I am viewing?
One solution, I knew, was an impressionistic alla prima technique, and although its effects can be strikingly fresh, for better or worse, my own temperament is drawn to painting in layers, often termed “indirect painting”. Yet attempting to use an indirect technique for sequential forays of painting “en plein air” spelled trouble if I didn’t know fairly precisely where I wanted the painting to go.
Thus, I began to create fairly detailed studies both in watercolor and in pencil in order to understand what I felt and wanted to finally express in paint. Of the two approaches, I felt the (pencil, charcoal or ink) value study to be the most effective for describing my essential reaction to a view. The medium toned paper gives space for imagination to roam, inviting the perceiver in to participate in forms as they arise.
Alternatively, although it is clearly possible to take a photograph in order to capture “a moment” as preparation for a painting, photographs themselves are a mechanistic interpretation of visual reality, inevitably reducing three dimensional space to two. If I want to personally interact with the view before me, to dance with it, to make love to it, to merge with it, then the means needs to be an extension of my fingertips, vibrating with the energetic impulses of my own blood. This is in no way intended as a criticism of the fine art of photography, only a criticism of the use of photography as a means for a study upon which to base a painting.
When I have created a value study that resonates, then I transpose it to a panel and begin preparing for development of the painting.
Gesso
May 9, 2009
Various recipes exist for gesso. Here’s what I use:
The Glue:
Dissolve 2 3/4 ounces of dry rabbit-skin glue with one quart water in a big glass jar (used pickle jars are great for this). This equates to 75 grams dry glue to approximately one liter of distilled water. The proportions work out to approximately 10/1 water to dried glue by volume. Many professional egg tempera painters suggest a higher percentage of 16/1. (I will try this next time around.)
Let it soak overnight.
Heat the glue in a double boiler, that is, with a second pan surrounding the jar with the glue water. The water should be the same temperature as the glue water, so bring the heat up slowly to melt the gelatine glue. Stir gently. The glue should never boil, only melt. Overheating significantly harms the adhesion of the glue, so do not let the temperature rise above 135 F° (57.3 °C), 127F° (53°C) is optimal.
The Filler:
I use calcium carbonate or precipitated chalk or whiting for filler with 10% titanium white or zinc white to insure a bright whiteness to your gesso. The chalk whiting part can vary in both purity and whiteness, depending upon the grade. Industrial grade chalk whiting can be found in most hardware stores or paint shops but I currently buy my calcium carbonate from Kraemer Pigmente. Dry pigments can be found at art supply shops or online suppliers (like Kraemer).
The proportions are 1 lb filler (or 450 grams) to one quart (liter) of glue water. Or 1 1/2 filler to 1 glue water by volume. The chalk is gently poured into the melted glue. I hold a funnel above the glue water, slowly adding the filler. Ideally you should be able to add all the filler in this way until a slight pyramid of filler forms above the fluid surface. Gently stir the mixture, but be careful to avoid creating any air bubbles. They can translate into pinholes in your gesso that are impossible to remove, adversely affecting your pristine starting ground. Lumps can be stirred or strained out (with cheesecloth). The final result should be about the consistency of light cream. Return the mixture to the double boiler (as necessary), keep it warm, but never let it remain too long on the heat as this can adversely affect the integrity of the RS glue.
Applying the Gesso:
Sand the panel lightly to remove any rough texture, clean the dust off with a moist cloth. Cover the board with a light coating of size (1 1/2 oz rabbit skin glue dissolved in one quart water or 45 grams glue to one liter). After the size has dried, begin applying thin coats of gesso. The first coast is loosly brushed or scumbled in. I prefer to apply the gesso to both sides and ends of the panel to avoid any uneven absorption of moisture which might cause warping. I use a wide flat bristle brush (2″), applying thin layers in alternating horizontal and vertical layers. The layers dry quickly, especially in warm weather. Generally a well prepared panel can take about 10 thin coats of Gesso. I wait until 3 or 4 levels have accumulated and begin lightly sanding it down between layers, and then use a moist cloth to remove the dust. For proper adhesion between the layers of gesso it is best to complete your panel in one day’s working session.
Finishing:
After the final coat, the sanding moves from coarse to fine. As a last step, it’s possible to take a slightly damp cloth and rub it gently over the entire surface in circular motions in order to obtain a final smooth, egg shell-like finish. If, however, you intend to use the panel for silver point, it is best to leave that last step out in order to retain a slight tooth to the panel.
Egg Tempera Palette
May 9, 2009

My collection of dry pigments in the studio
The list of pigments available for use in egg tempera is essentially the same as that of oil with the exception of the lead based pigments of naples yellow and flake (lead) white. They are highly poisonous and so should be avoided in powdered form. Additionally, the lead based pigments discolour upon exposure to sulphur fumes. While this discolouration can be avoided by varnishing the final picture why bother when so many other safer pigments are available today?
Powdered pigments can be quite exciting to see and to use – especially for the first time. In egg tempera, you must always work with powders that you grind up into paint for the daily session. I use a glass muller and a piece of frosted glass for this purpose. It is also possible to pre-grind a number of common colors in distilled water and keep this paste in a small airtight jar (with a moistened sponge inserted in the lid) ready for use. This saves working time and energy. This larger work of grinding up pigment pastes then needs doing only once a month or so (depending on your climate and usage). The muller and glass plate need to be thoroughly cleaned after each grinding session.
For daily painting, I usually temper (with egg) only a few pigment pastes for each session. This does not take alot of extra time or effort. A bean of pigment paste mixed up with an equal amount of egg suffices for the paint of the day. A quick test consists of stroke on a piece of smooth glass. When it dries and can be lifted by a one sided razor blade it shows itself to be an internally cohesive ribbon of colour. If it does not form a ribbon and instead dissolves into powder you have not added enough egg yolk.
My palette:
- ultramarine blue (a cool blue)
- thalo blue ( a warm blue. Exceedingly difficult to grind so it requires much patience but since it is such a beautiful colour it’s well worth it)
- cadmium yellow medium (a warm yellow)
- Permanent Lemon Yellow (a cool yellow)
- Cadmium red medium (a warm red)
- Alizarine crimson (a cool red. Another pigment that is difficult to grind but also is well worth it.)
- venetian red (red iron oxide)
- viridian green
- raw umber (fantastic for shadows)
- burnt siena (great for achieving quick grounded warmth)
- yellow ochre
- mars black (carbon black is not good for aqueous solutions)
- zinc white (good for achieving light tints that you wish to also contain some body. As my proficiency increases I tend to use this less and less. The original white of the gesso panel is all the light I ever really need – or want.)
I tend to honor spectral purity of each pigment so I usually don’t mix up colors on the palette but instead superimpose thin layers of hues to achieve a given colour.
Fresco Secco
May 9, 2009
It is a matter of (pretty) common knowledge that one cannot paint on a finished fresco – and hope that it will last. There are many examples of old frescos, now sadly peeling. Therefore, if you must paint secco, take my information, as word of mouth – from a professional. A professor from the Royal Academy of Art in Antwerp gave me this recipe. After five years, the secco painting still looks fine.
The Size:
Pour 80 ml of methyl ethyl alcohol into a chemist’s beaker. Fill it up to 100 ml with 20 ml of Artist’s grade Shellac. Stir a bit. The size is now ready to use. Paint a coat of it over the surface of the fresco on which you wish to work. It is dry and ready for paint in one half hour.
Painting:
The sealed surface is now ready for paint. Pigments mixed in water can no longer merge with the plaster for permanency, therefore, a medium is necessary. Casein, oil or egg tempera? I have read that Casein has been traditionally used, also oil, however I preferred to use egg tempera. This worked just fine.
The Panel
May 7, 2009
The Panel:
A firm non flexible ground is necessary for painting with egg tempera. On good linen canvas, the oil medium can sustain flexing and shrinking, but egg tempera cannot. If one chooses to work exclusively in oil, canvas may be the ground of choice. As I prefer to use a mixed technique, painting on panel is my preference. Additionally, I find the smoothness of the surface very sensuous.
Of the choices readily and economically available to painters these days, my personal preference is good quality, plywood panels. They are heavier than Masonite but in the long run, more absorbent. They do not warp, and the fine crackles that can occur in the gesso from slight wood expansion can be avoided either by obtaining a high quality piece of plywood from a cabinet maker or by gluing a thin layer of fine linen fabric to the board before the first coat of gesso.
Mixed Technique
May 7, 2009

Jan van Eyck mixed technique
The term mixed method or mische technique is generally used to refer to the painting technique of Jan Van Eyck and the Flemish Masters. The mixed part quite literally refers to the method of intermixing the usage of both water based and oil based mediums to create a pictorial image. It requires both patience and sufficient knowledge in order to achieve an attractive result. Traditionally the resulting image was super realistic, but it does not have to be. The main thing is you need to know where you are going. This method allows for the creation of multiple layers of paint which through their superimposition over one another create beautiful effects of both light and color: the essence of abstraction. My own “mische technique” is a bit of a hybrid, using the traditional recipes for sessions of indirect painting and yet allowing each session to be a complete alla-prima painting session.
Nicolas Wacker
The originator of the modern adaptation of the so called mische technique, is a Russian man named Nicholas Wacker, who taught at the Ecole des Beaux Arts, Paris in the early 80’s. I’ve received it from a friend who studied there at that time, thus here below are her class notes:
It is useful for brushability, quickness of drying and glaze layering. Through using this technique one can maximize the use of glaze while simultaneously painting opaque areas into the freshly laid on medium. A fan shaped dry brush can be used to blend and unify the surface. Strong areas can sink into the background while lighter tones can be emphasized. It seems possible that the yolk of an egg could be substituted for the alcasit, though I have never tried it.
Emulsion:
- 1- volume alcasit (methyl cellulose glue)
- 1- volume half of which is pure linseed oil with 1/5 eburit dryer (or sun thickened linseed) and half damar varnish 2:1
- 1- volume water
- Put liquids in a jar in the order written ( alcasit first) and with each addition cover the jar and shake it in well. I heard water could be as much as 3 volumes but never tried it. The result looks like mayonaise. (don’t eat it!)
Medium:
- 1 part damar varnish
- 1 part turpentine
- 1 part stand oil (sun thickened is also fine)
Coat panel or canvas with a light coat of glue size. For canvas, use a recipe for good lean priming (commercial lead white in oil, 1 pound thick paint, diluted with 3 fluid ounces of turpentine). Add at least 3 coats brushed on in opposite directions, lightly sanded in between (if you sand a surface containing any amount of lead white be sure to take precautions. Wear an appropriate mask to avoid inhaling the dust.). For gesso grounds on panels it is best to apply at least 10 thin coats painted in alternating directions, sanding in between coats.
The Design
Find an image from which you wish to work. It can be a reproduction of a painting you admire, or a drawing of your own. You should be able to render it in black and white value studies as well as forsee the addition of color. Transfer the drawing to the primed canvas or prepared panel. Render it in waterproof india ink. Be sure to erase all pencil lines after the drawing is transposed into ink. A final glue size is applied on all surfaces after the preliminary drawing but before the imprimatura.
Paints
It is best to mix fresh white for every session. Use a white powdered pigment (titanium or zinc – but not lead white for toxic reasons) and emulsion. I prefer titanium because of its covering power but it you want a more translucent white then you might choose zinc. Take a glass muller or spatula, pressing, dragging and blending the two together until a consistent texture is achieved. This helps considerably with quick drying. Pour a small amount of emulsion into a small cup or bowl. Use this to increase the brushability of your oil colors. Remember to always honor the fat over lean principle. If you are able grind up your own colors, you will be able to avoid buttery, oily colors from the manufacturer. In additon, you will learn first hand which pigments require more oil to achieve a workable consistency or in contrast which grind up easily and are therefore ‘lean’.
Imprimatura
The white ground is covered with a translucent middle tone. I usually use damar varnish diluted with turpentine 3(T):1(D) mixed with an earth tone (yellow ochre, an umber or a sienna). Using a wide bristle brush apply over the whole panel to achieve a common medium value for the beginning of the image. If you are painting over a traditional gesso ground this priming step is crucial so as to reduce the absorbency of your substrate. If you neglect doing this step you may have trouble with the “sinking in” of your oils later on. If you are painting over an oil primed canvas, just be sure to keep this imprimatura diluted enough to establish a good transparent middle tone. If it is too dilute you may have adhesion issues with the oil ground, if it is too oily, you will have adhesion issues with your successive layers. Time and experience will tell.
Session 1
After this imprimatura is dry, few days should suffice, you can begin to globally establish the values of the painting. Cover the entire painting with a fresh coat of clear medium. Take a clean, dust free cloth and wipe the surface of excess medium. The surface should be tacky and receptive.
Into this slightly tacky surface work in white mixed with emulsion for strong light areas and drag them into the background with a dry brush. This produces a soft way to suggest future values. After that, using a diluted tint of dark pigment (a sienna or an umber) to establish some of the three quarter tones in the shadows. This quickly establishes the values of the painting and you can step back and assess how your idea is working and correct where necessary at an early stage. At this stage it is important to work in passages of opacity, mixing your tones and colors with a bit of white pigment. Let it dry.
Session 2
Repeat the steps as described above. Starting to work in large blocks of color, alternating glaze or emulsion for transparent or opaque effects, respectively. Values can slowly be adjusted. One proceedes from coarse to fine detail. Highlights and shadows can be further refined by moving away from the midtones of the imprimatura while still remaining ‘unfocussed’. Later sessions can define fine highlights and precise shadows. Allow the image to emerge slowly. Don’t fall into the details – yet.
One lovely advantage of the mixed technique is brushability. You can paint one color next to another area of color, then using a dry brush gently blend one area into the other. The colors softly merge without contaminating each other. Good sable brushes are invaluable for manipulating paint; fine bristle brushes can be used for painting larger areas and dry merging. Each painter needs to find his/her own taste. But remember to keep your pigments as pure as possible. Color is color. Mud is mud.
Session 3 or more?
The painting needs to dry thoroughly in between sessions. By using the Mixed Technique and one’s own ground up lean colors, drying time can be greatly reduced. A week is usually enough. In the beginning stage when the painting is less saturated, the drying time might be only a few days. Techniques to insure a lean and thirsty ground are useful. I prefer painting on a firm panel coated with 10 thin coats of traditional chalk gesso. If you do not fully cover this panel with an underpainting of egg tempera, then a coat of size or an imprimatura as described above will be necessary to reduce the absorbency of the gesso. This technique will act differently on canvas, primed with white lead than it will on a panel primed with traditional gesso. The white lead will not be as absorbent.
How many sessions does it take to complete an image? This is best answered by experience. In general, don’t be impatient but also don’t be over generous with your (oily) glazes. Sooner or later there will be a point where the surface cannot receive any more paint. This is not a fast results technique. It can create lovely possibilites for translucent color effects enhanced in layers of glaze, yet contrasted by areas of solid color. Try it out for yourself.

