Casablanca #3: the raised-relief collage level
June 3, 2026
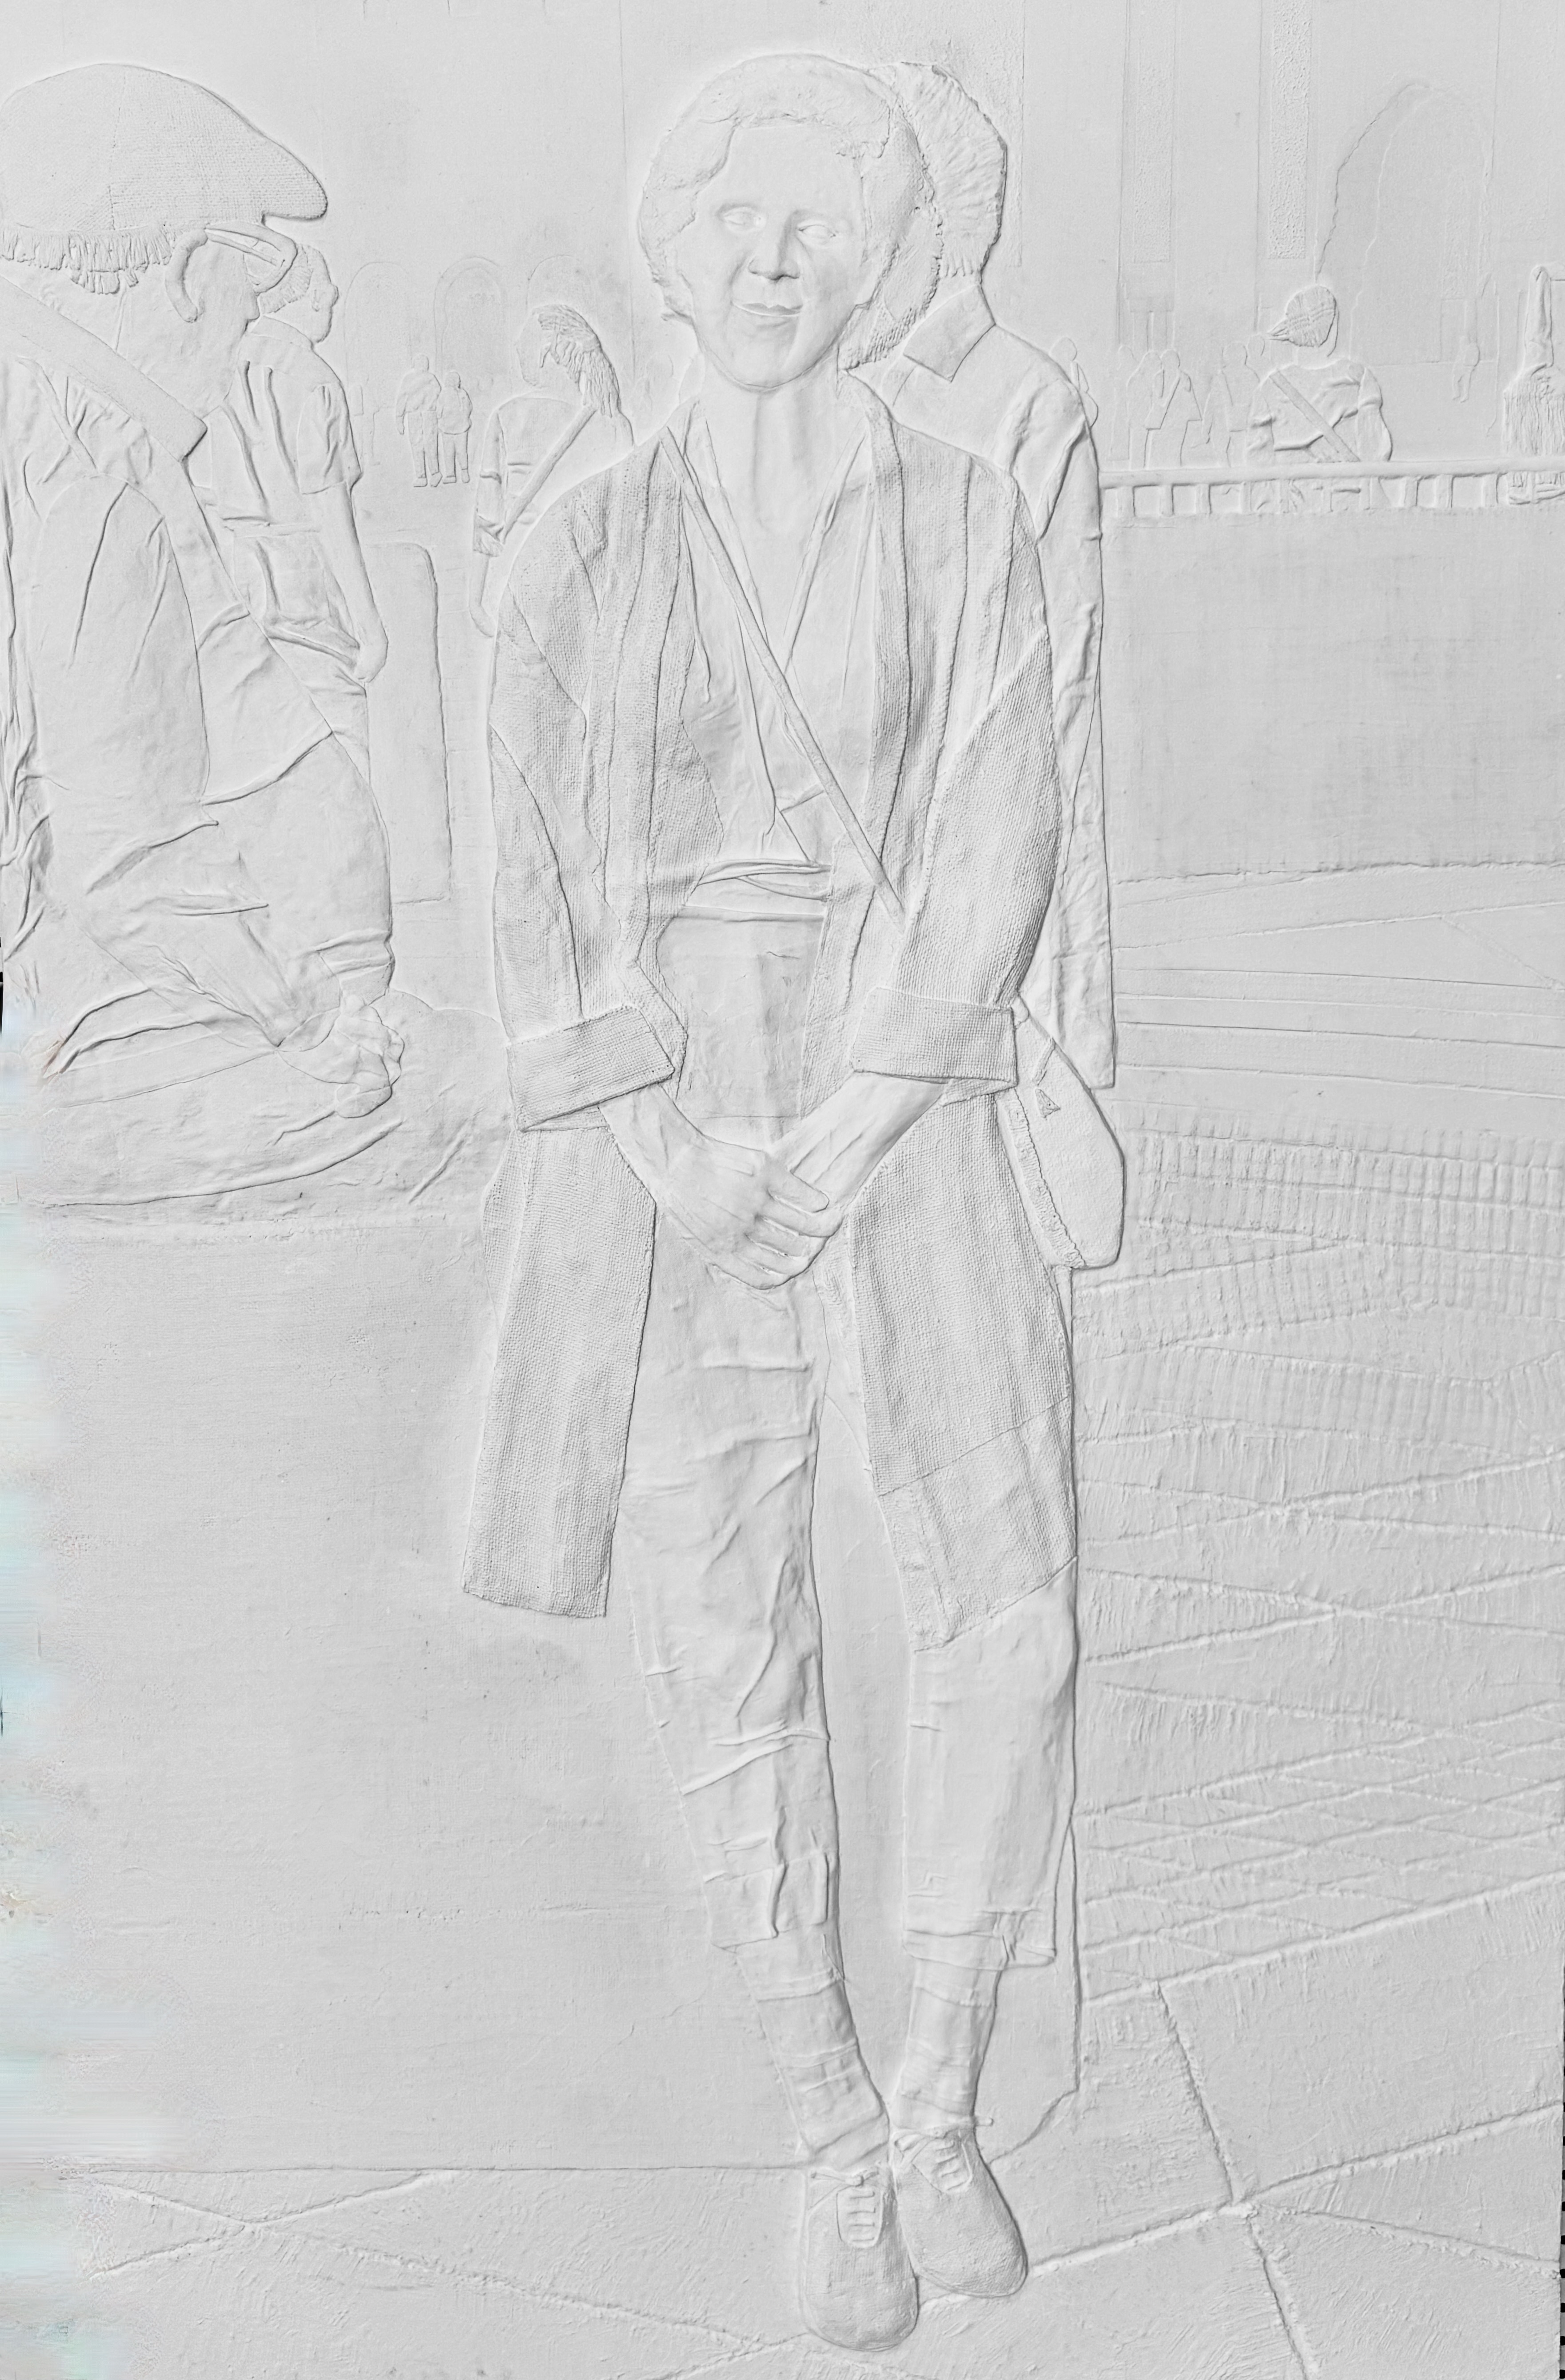
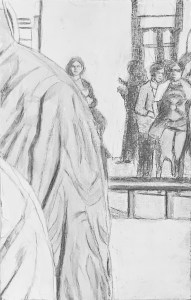
I’ve been working on a life-size (approximately 6 feet by 3.5 feet) raised relief multi-media collage for about four years (not steadily though, it’s more like fits and bursts, often with six months or more in-between). Anyway, I currently have something to show for it, see image to the left, as this level at least now nears completion.
To begin with, this raised relief is the third version of the same image (all life sized). The image itself is a photograph taken by my husband John, spontaneously, in Casablanca in 2018 (thus the name for the series). The first version I did of this image consisted of cutting up the photograph into 64 equally sized squares and painting each square separately using different techniques. I called it “Pieces of Me”.
The second version (of the same image) consisted of taking those 64 source image/squares and rendering each in one technique – silverpoint (highlighted with white acrylic paint). That resulted in a large daguerreotype image which I then abstracted by splattering with white paint, I called that version “The Peace of Me”.
But as images and the creative process goes, sometimes, as you create one piece, you already begin to envision another. I started dreaming of creating a raised relief of the whole image. No 64 squares this time, something far more unified. Rather, how about a sculptural treatment, lifting, recreating as it were, a three-dimensional reality from a two dimensional photograph? I didn’t know how to do that but thought that it might be possible by using plywood, fabric and a melange of acrylic products for fusing it all together. So I began.
What follows is a short documentation of my working method. First, I realized that the photograph itself was actually a landscape, with a foreground, middle ground and background, so theoretically, it should be possible to begin by rendering the background elements directly onto a panel in a collage-type manner. I stabilized a large piece of 3/8″ beech plywood with wooden struts on the back side and began glueing in pieces of paper, cotton, linen and burlap of various thickness, weights and textures, according to the given design. I used GOLDEN products: GAC 100 for sealing the wood, GAC 400 for stiffening and shaping the fabrics, Soft Gel Matte for gluing the fabric to the wood and Light Molding Paste for shaping the forms (as needed). The background level went relatively quickly. Within a short period of time, I had created the architectural arabesques and figures which peopled the rear of the image. I covered the whole thing with a few coats of (white) gesso so as to better see what I had. So far, so good. Next step.
I had already selected the wall plus the two figures behind the main figure as the middle ground, so I cut out an 1/8″ piece of plywood to include those elements and laminated it onto the background plywood – in the area which I had left blank for it. For glue I used Titebond Ultimate, plus wood screws to insure good adhesion, removing the wood screws after the glue had dried. Sculpting the middle level was fun too, and built upon the skills I had already acquired for creating and modeling dimensional shapes. It too, went relatively quickly. After coating this level with a few coats of gesso I was surprised both at the progress and to see the forms taking shape. Nice. I was encouraged. Still, I was entirely unsure about my ability to sculpt/render the main figure. Time to think about that – now.
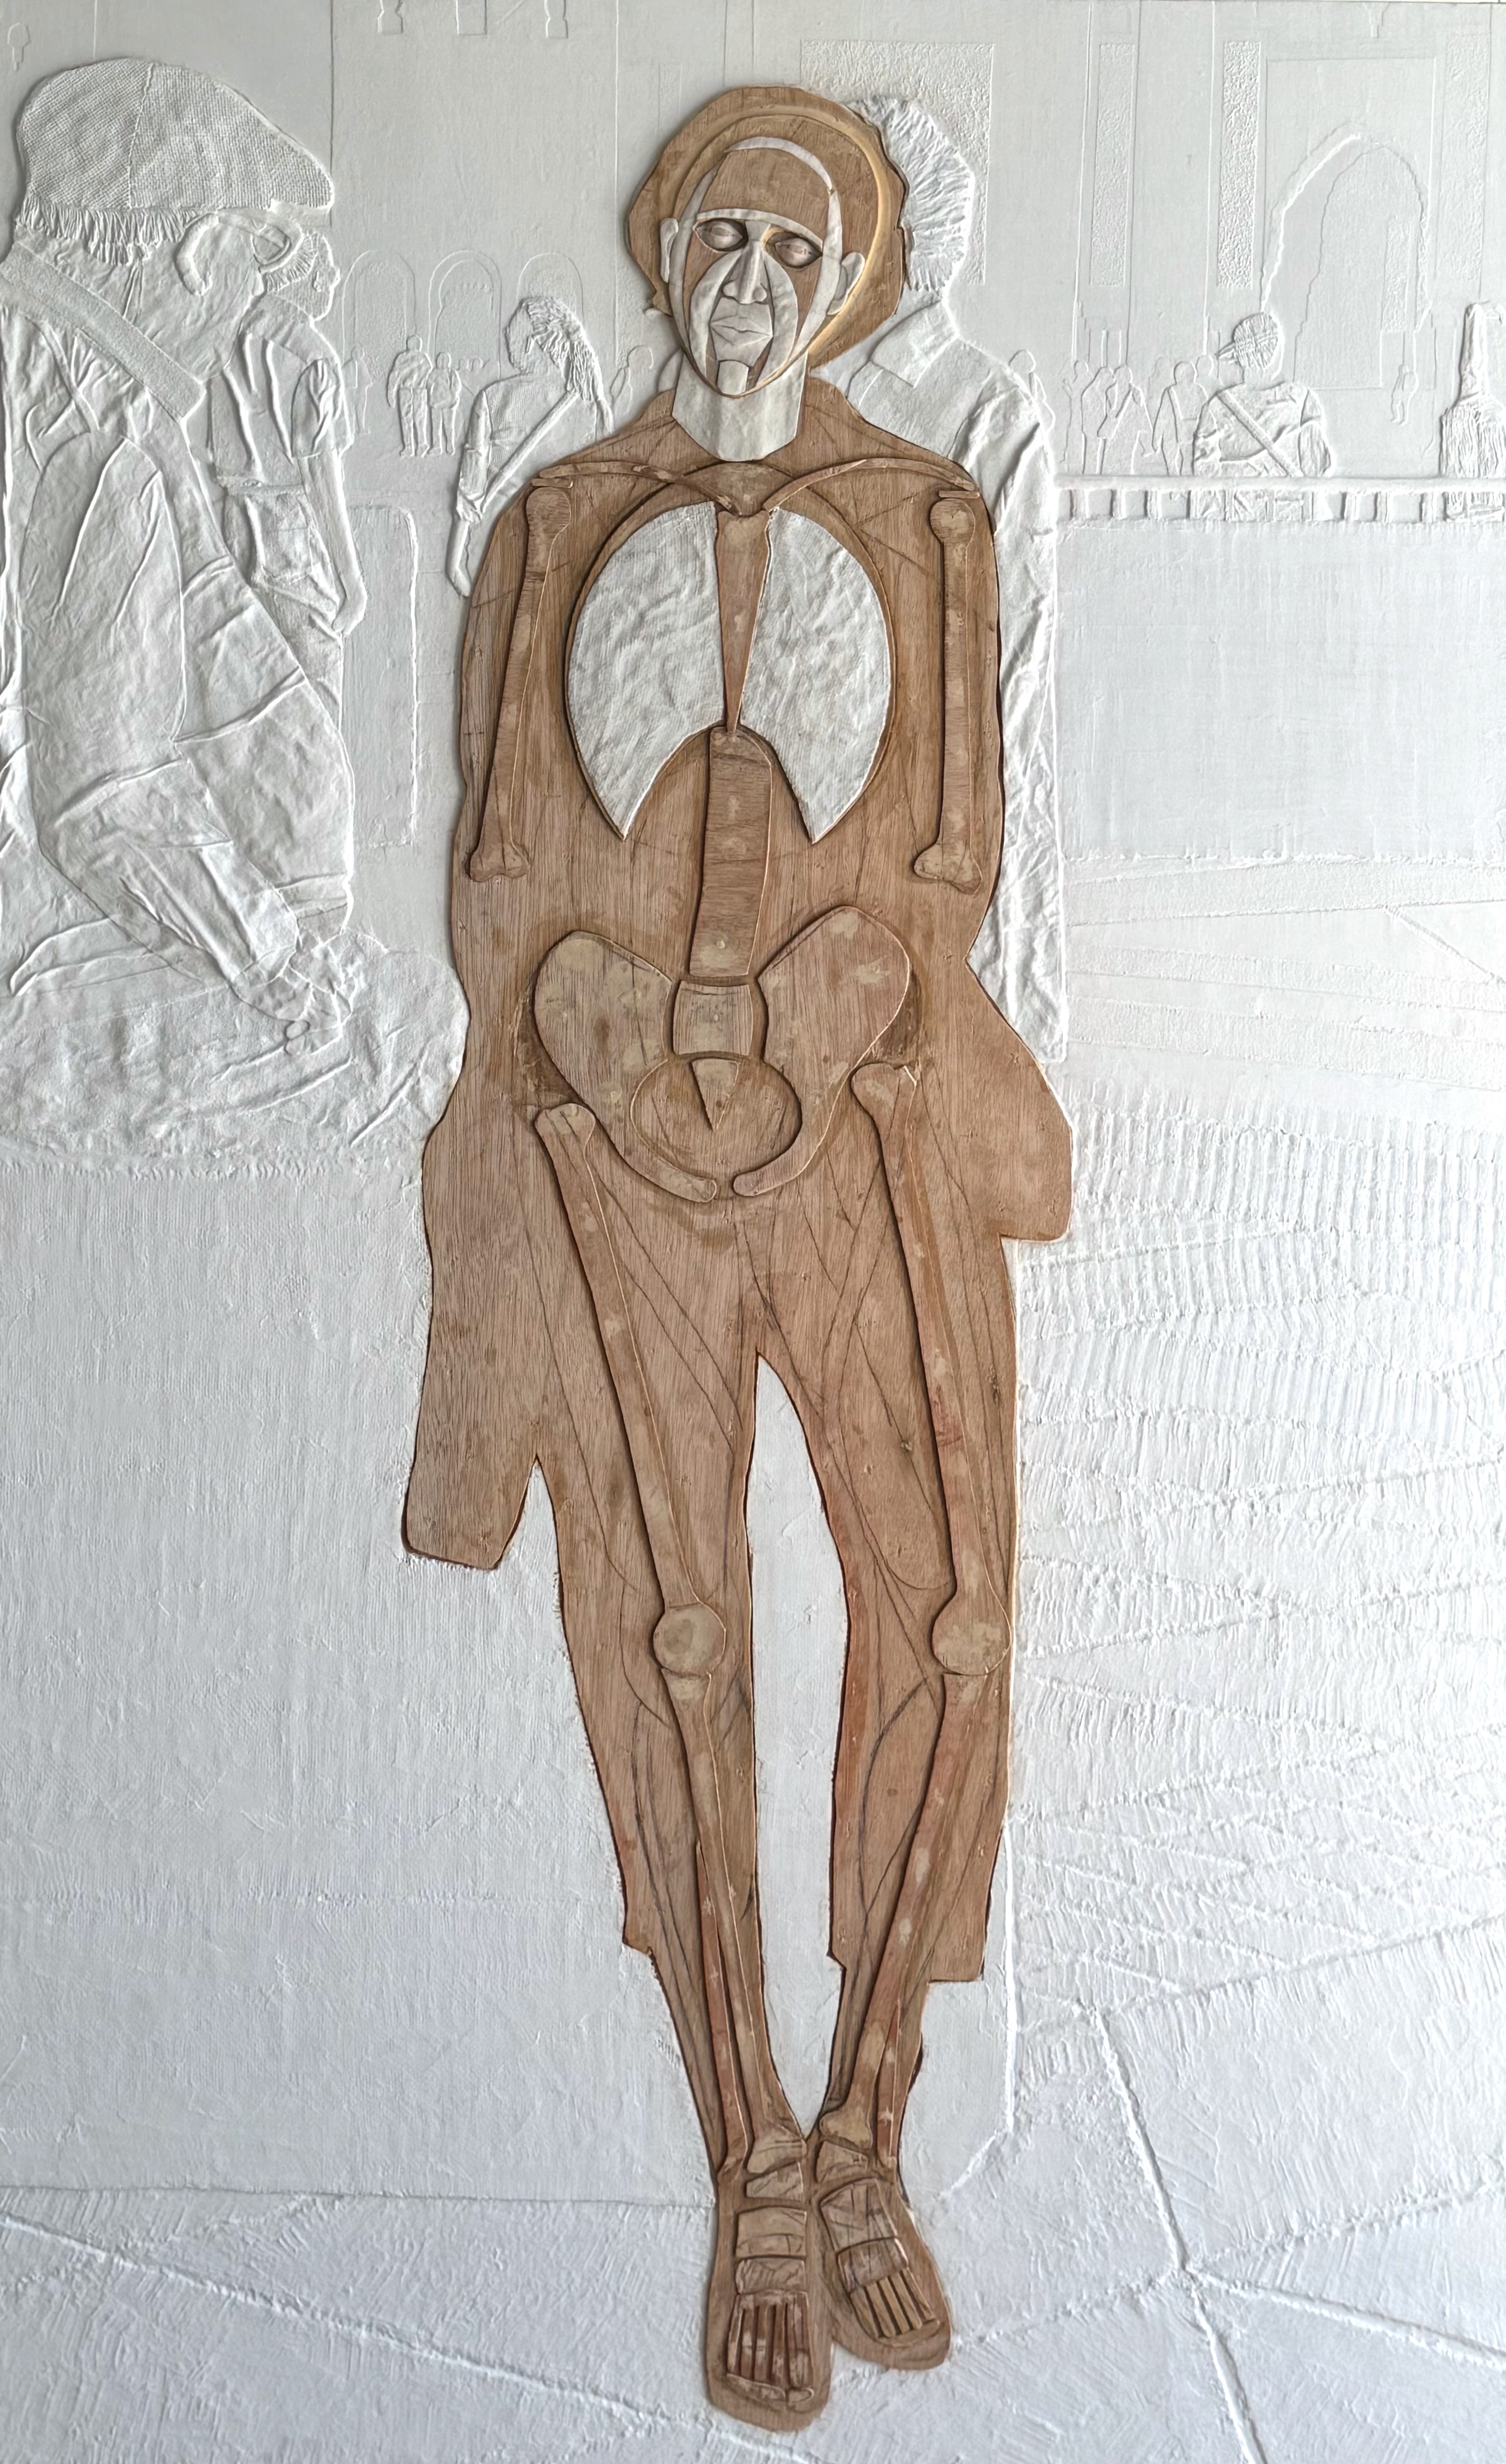
I cut another !/8″ plywood piece for the main figure and laminated in the main figure. Perhaps I could just leave it blank and treat it as an abstract shape? But no, that felt like a cop-out – even though my ultimate aesthetic aim was not realism. And since I was already deep into studying figurative anatomy and the graphical tools for rendering the human form effectively at the Watts Atelier in Encinitas, I decided to use this an opportunity to gain a deeper understanding. My first breakthrough was in discovering the clavicle notch in the photograph(!). I realized I could build the figure proportionally and skeletally using that as my navigation point. So I began creating schematic drawings. I was working from a photograph of a clothed figure which made it very difficult to see anatomy. I needed to exercise a kind of x-ray vision to discern what was where. After I got a skeletal design in that felt relatively accurate, I began laminating in a skeletal pieces according to it. I knew it would provide the form on which I could hang muscles and clothes later, see image to the right. Important, especially at this stage, was to feel the gesture.
I then began creating similar schematic drawings of muscular groupings. However, to create the muscles something different than plywood would be required. I began cutting out shapes from thick cotton according to my muscle schematic. I added Light Molding Paste to the backside of these shapes to give them dimensionality. When the forms dried, I glued them onto the skeleton. It was slow work as I felt my way forward.
At a certain point, perhaps impatient to see what I had, I began glueing in the clothing. In some places that read just fine, but in most other places it was clear that this skinny little figure would need some rounding out, some softening. Luckily, since I was working in acrylic, which is high class glue, adhesion of the successive layers was not really a problem. I used Soft Matte Gel, which is a strong glue, along with a staple gun to create the pressure needed during the drying process (removing the staples when it was dry). As time progressed it became a process of modeling using Light Molding Paste to round out a form, and then glueing back in the appropriate fabric texture using Soft Matte Gel. In some locations it went back and forth. In this way the form filled out without creating too much extra weight (always a concern for a sculpture/painting that ultimately needs to hang on the wall). I covered new additions with gesso so as to “see” what I had.
Of course, the creation of the facial features was and is always a challenge but it was a challenge I no longer felt I was incapable of meeting. Working this way with my materials: I knew how to add volume (with fabric and acrylic paste) and delete unnecessary shapes (using my trusty one-sided razor blade). This is what I have come up with for now. I’m gonna let this sit for the summer and do the last adjustments in the fall. Finally, when I am happy with the relief, not only will it be a relief but a partial monochromatic glazing/painting is planned. To be continued for sure….
Acrylics and indirect painting
September 13, 2020
I just finished a series of paintings all executed in acrylic. These panels were conceived of so as to be included within a larger project. That project consists of sixty-four panels all executed in different techniques, but which, when assembled, would create one completed image (currently, still yet to be completed). Yet when taken on its own, each panel is/was intended to function independently – aesthetically independent of any overriding visual-conceptual structure. Some might say that is a tall order. And it is, but in my experience, if the original image is well chosen, it can work out.
The subject matter for each individual panel then can be seen as either an abstract “background composition” or a piece of “deconstructed realism” (though in actual fact all sixty four panels are pieces of deconstructed reality). Additionally, depending on the technique used and the preparation of its substrate, each panel lends itself to a coarser or more refined approach. In a sense, there was nothing to be done about either as they were my givens to myself: the rules of the game, so to speak.
The abstract compositions then were relatively easy: lines, shapes, forms, textures, hue and value contrasts. I could riff off any given composition with relative freedom. And I did. The (deconstructed) realism ones were more difficult because there were obvious body parts referring to a reality for which the story was (as yet) unknown. So these details were (potentially) more significant.
With acrylics it was relatively easy to switch back and forth between a coarse, impasto approach (using the painting knife and/or a coarsely textured sponge) and a refined, detailed approach using a brush or maybe a fine-celled sponge. In fact, many panels combined both. Nevertheless, what I want to speak of here is the degree to which the underwork, that is, the underdrawing, underpainting and impasto can prepare the panel for a quick, spontaneous, alla-prima final painting session. This is entirely possible in acrylics – just as it is in oils – though of course it all proceeds more quickly in acrylics. If you do your homework you already know where you are going, so the final session may take an hour or two at the most(!). The preparation work itself might be slow and laborious so that the final session need not.
A Piece of Me #44, acrylic over collage on panel.
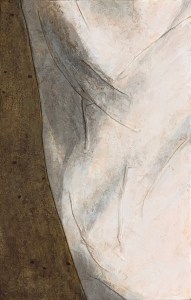
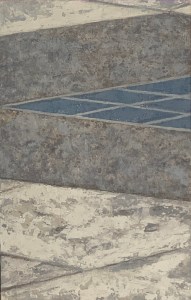
There were panels where the painting proceeded quickly and spontaneously in a forward developing motion. I could build upon my structure and leave many elements exposed in the process, creating more visual and structural depth. The shading in the floor tiles on panel #24 is a case in point. The shadows on my face and hair in panel #04 is another. The collage, underdrawing and imprimatura in panel #44 illustrated here to the left (with link) is yet another example of how much the underwork can contribute to a final painting – again, when you know where you are going.
A Piece of Me #39, acrylic on panel.
There were times however, during the process of over painting when I needed to reclaim that preparational understructure. I have come to call this process “painting backwards”. This means, reclaiming your underwork particularly in the quarter tones and highlight areas. There are a few panels where I used this extensively. Normally I use a small bright bristle brush to reclaim some detail or highlight that has become obfuscated by a larger, wider brush stroke. For example, I used my small bright bristle brush to reclaim the grouting lines in panel #39, see image with link to the left. I used the same technique on the tile work in panel #54. When I paint with oil I have used turpentine as my solvent, but in this acrylic series I used water and, because acrylic dries so fast, I had to work quickly.
All this work and paint manipulation applies to the recognition that painting is essentially about creating an illusion. An illusory world to which you are inviting the viewer to participate in. It may be realistic, it may not, but mostly you are creating a sensory space/place for the viewer to wander in with their own gevoeslmatig (feeling-sense) consciousness, disconnected from the world of concepts. When you can create this illusion with a minimum of means, a sense of freshness arises. In addition, when you operate through layers, the original luminosity of the substrate is able to show through delightfully in places – even in the shadows(!). That luminosity is so much more pleasing that any amount of opaque white you can ever slap back on. For this reason, I have become an advocate for an indirect technique and I’m pleased to see how well acrylics can adapt itself to it.
Underdrawing for acrylic
August 24, 2020

Pen and ink Underdrawing for A Piece of Me #59
I am currently involved in a project which calls for thirteen panels to be executed in acrylic according to a pre conceived design. Thus for starters I wanted to transfer the basic elements of the design to each panel. Since I haven’t used the medium for about forty years I had to search around a bit to see how best to do that.
To my surprise I did not find a lot of information online about creating an underdrawing for painting in acrylic. Most information I found concerned transfer of the design and then getting rid of the drawing as soon as possible. That’s not what I wanted. I want the underdrawing itself to play a role in the final painting – and not just in a paint-by-number, outline kind of way. What I sense (but don’t know) is that painting indirectly, which makes use of underdrawings in a foundational and yet implicit way, has gone somewhat out of vogue. Thus the information I found only partially addressed my interest.
Anyway, the first important thing I did find was to avoid traditional shellac based india ink. This is because the subsequent acrylic paint would act as a solvent to the shellac and (at least partially) dissolve any careful design. Solving that problem was relatively easy as there were acrylic based black inks readily available at my local art supply store. I dipped a pen nib into the ink and proceeded to lay in basic elements of the designs. The pen and ink approach proved to be especially useful for the abstract composition parts of the series. There is an illustration of one of these above, left.
Underdrawing for A Piece of Me #14 in pencil. (before the smear campaign)
However I also had some more complex designs that required more detail and subtle changes of gradation than the pen and ink method allows for so I switched to pencil drawings – mostly because I was most comfortable with that medium. Not a good idea. There had been information online warning about the use of a graphite pencil, but a few artists recommended spraying the completed underdrawing with an intervening level of fixative before beginning to paint. So I tried that. But it didn’t work. My softly detailed underdrawing quickly smeared into my first coat of imprimatur. Thus I definitely do not recommend using pencil for your underdrawings in acrylic (or oils).

Reclaimed underdrawing in acrylic ink wash (with pen and ink touch ups) for A Piece of Me #14
What I do recommend is transferring your design using vine charcoal, then drawing it in either with a pen nib or painting it in with a brush, or a combination of the both. Then, after the basics of the design have been created and the acrylic ink has dried, go over the entire surface with a kneaded eraser to get rid of all traces of charcoal. At that point you will have an indelible black and white underdrawing that can be used in whatever way you choose for further levels of acrylic paint.
A Piece of Me – the beginning
September 12, 2019
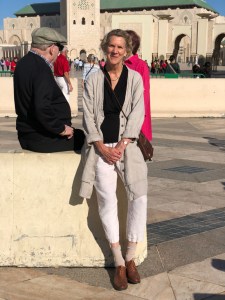
Self portrait in Casablanca outside of the Hasan II mosque.
Last week I finished the preparation of 64 identically sized panels (21 x 13.3 cm or 8 1/4 x 5 1/4 in.) for a new project. It consists of cutting up a full length photograph (which happens to be a self-portrait, see left) into 64 identically sized pieces and then painting each piece differently, so in a different medium. Since there are not 64 different mediums, in effect, I’ve reduced my approach to five: egg tempera, encaustic, the mixed technique, oils and acrylics. Preparation-wise then, each medium receives the ground appropriate to it: egg tempera receives chalk gesso; encaustic and mixed technique, ditto; while oils receive an oil ground; and acrylics, acrylic gesso. Additionally each panel receives a pre-treatment (or not) thus: plain wood (so, no treatment); linen (glued on, using rabbit-skin glue); collage (glued on, again using rabbit-skin glue); pre-textured sculpting (I used acrylic modeling paste for the acrylic and oil panels while I experimented with pastiglia for the egg tempera, encaustic and mixed technique panels). Needless to say such an approach presents a bit of a logistical nightmare but excel spreadsheets can, indeed, work miracles.
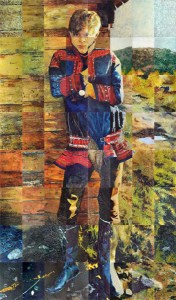
Nils, 1978, final full-sized assembled painting. 6‘ 02” x 3‘ 6” or 188 x 107 cm
Anyway, instead of this appearing to be a new direction, actually, it’s not. It’s a return to the kind of work I was doing approximately forty years ago, see “Nils” right. You can read more about that painting project here. I also did a few other smaller pieces at that time trying out that same approach and I briefly dabbled with it again (as an approach) in 2011. But after stumbling upon an appropriate photograph earlier this year, I’m drawn to return to it now with a deeper understanding of many things. So, here we go. I love how the compositions you receive with this approach are completely arbitrary and spontaneous. The challenge, as always, is to create a sensorial unity, something beautiful and interesting in its own right individually and of course, in the final assembled result.

