Picking up the pieces of my broken love
June 4, 2019
I recently picked back up on a painting project that I had left behind me a number of years ago. During this interim I had pursued achieving a Masters degree in philosophy at KULeuven in Belgium – which was great fun – but did not leave much time for artistic projects. So now, getting back to the drawing board certainly feels good even as I shake off the rust/dust.
The piece I’m discussing here is based on a watercolor I did back in 2014 of a farm along the Dammsevaart outside Bruges, Begium. The watercolor is high in quarter tones, so, low in contrast, thus it does not reproduce well. Still it gives me what I need.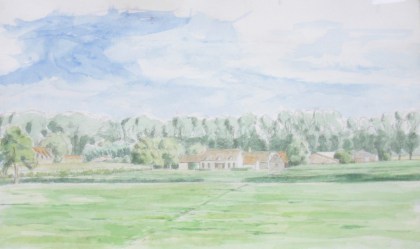
I had already transcribed it using silverpoint (no image available) and then worked up an egg tempera underpainting before letting go of the ball sometime back in 2015.
So now, before I began to work in layers of oil in the studio I covered it first with a light size and then also laid in a light coat of raw umber-tinted retouch varnish. The size protects the egg tempera while reducing the porosity of the traditional gesso while the retouch varnish also reduces the porosity while providing a unifying middle tone. It seems possible that I could have done either the one or the other (but not both) but I decided to do it anyway – and I’ll assess how the porosity of my oil glazes functions. I ended up with the following image. It may be ugly now but still, I think it will serve my purposes.
The next step was to begin laying in areas of oil paint using the mixed technique. Basically, this requires covering the area on which I intend to work that day with a light glaze of clear medium (my recipe is 1 stand oil:1 damar:1 turpentine). The medium should sit for a few minutes (about 10 – 15) so as to penetrate into the gessoed surface. Then it is wiped off using a clean, lint free rag. When all goes well, this produces a slightly tacky, wet surface into which I can introduce oil paint (tempered with emulsion, recipe here). This tackiness is quite important because the gessoed panel is quite smooth (in contrast to the weave of a linen canvas) so this tackiness give the paint something to hold on to. The “wet” surface is good to paint on for about 8 – max 12 hours max – so it’s important to only glaze an area that I feel I can cover in that time.
Since I already felt a bit rusty for this piece, I decided to tackle the sky first (no picture of just that phase), then followed it up with the line of trees in the background. This produced the following image. I began to think this might just work out. 
The next working session was the whole middle-ground area, the farm buildings and the middle-ground greens. The chromatic contrast of complimentary colors was now becoming quite evident and satisfying. After an approximately four hour working session I had the following image. Notice the transition from a blocked-in-dream to a Hopper-esque statement of light, flesh on bones: 
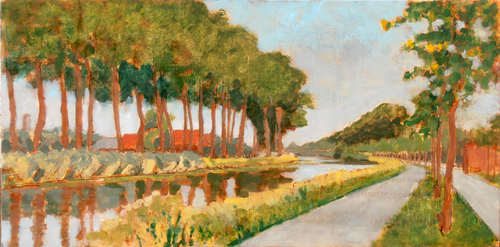
After that working session dried (about four days) I glazed up the foreground field and worked for about three-four hours to complete the painting. The brightest highlights were deeply informed by revealing the original gesso by “painting backwards”. This is done by erasing passages of emulsified paint using a small flats brush dipped in medium. Below is the result. 
Finally, after a few days I decided to improve, that is add some dynamic energy to, the sky. The day here yesterday was blustery (as the contestants at the French Open can testify). It inspired me to add some clouds. I glazed the entire sky with a unifying burnt umber glaze and then started slashing in blobs of titanium white and dry brushing it into the existing underpainting. A few days later I added more detail to the foreground field of grasses. Here is the final painting:

*******************************************************************
All this work might seem like an unnecessarily complicated and esoteric technique to someone interested in achieving a zen-like spontaneity to their paintings. All I can say is, if that’s what you want, then don’t even think about attempting the mixed technique. However, I myself was seduced by it almost 40 years ago and have been a devotee ever since. That’s not to say I have always been successful with it – for the most part I have not – as it is challenging in a variety of ways. But when it does work, the results are, or at least can be, sublime.
But why all the devotion? Because mixing emulsion into the oil paint tempers it, that is, turns it into a firmer, water receptive paint-medium (which bye-the-bye also dries more quickly than straight oil). This means that you are actually painting wet-in-wet (wet emulsion into the wet glaze medium). You can place two strokes of color adjacent to one another – yet each retains its own integrity. You can leave the strokes as is, or you can take a dry, fan-shaped brush (or your own fingertips) to lightly blend them. This allows for the best of egg tempera (with its hard edged chromatic purity) to be conjoined to the soft blending possibilities of oil.
And because you paint in layers you can, using clear medium, erase a freshly painted section or modulate an already existing dried passage by applying a new layer of tinted glaze. But the whole point of painting in layers is not to over-paint or over-work the surface but rather to allow the luminous nature of the original gesso ground to “speak” through, at least in places. Thus a luminosity is achievable that is not readily available by other means. The levels of painting possess hidden secrets (and/or directions) while simultaneously creating unexpected surprises. There are many possibilities, the greatest danger of which consists in walking past a perfection that you may not have noticed you have already achieved (!).
For the mixed technique you’ll need to:
- paint on a hardboard surface prepared with traditional gesso
- have a relatively clear vision (both in black and white and in color) about where you want to go
- pay attention to your recipes
- work in the studio (as en plan air conditions are just too demanding – besides being counterproductive)
- use a limited palette (for example, for this piece I used: lead white, burnt umber, cadmium yellow medium, ultramarine blue and mars red)
- realize that the spontaneity you seek already lies in the materials lying at your fingertips
- trust yourself and let go
A work in progress…
August 3, 2013
After a long hiatus (precipitated by moving into an old Bruges row house and renovating it, along with creating a little painting studio for myself) I finally had the chance to get back into painting these last few weeks – and the weather has been great!
I decided to do an oil of a watercolor study I had completed in 2011 of the bend along the Damse Vaart canal outside Bruges. It’s a great perspective, particularly around mid-day. There are some interesting middle ground structures on the left, while on the right the receding treeline stretches almost all the way to Damme. The strong mid-day shadows complement the movement and function as an anchor.
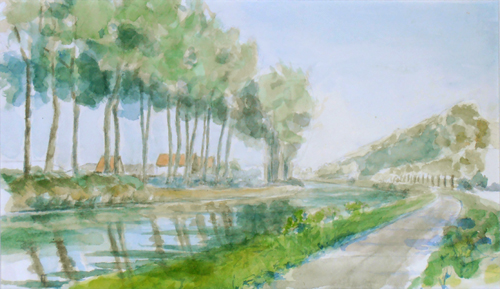
watercolor of the bend in the Damse Vaart, 2011
I transposed the basic composition of the watercolor to a panel, but decided to do the foundational ink drawing and egg tempera levels en plein air. For the ink level, I reverted to the stylus and nib quill-pen style of my youth, instead of the technical drawing pens I’ve been using ever since. I wanted to let the pen nib respond to my hand pressure with a thinner or thicker line, mirroring my response to nature. It worked quite well, except the ink jar fell over spilling most of its contents. Enough remained to complete my work, even if the drawing ended up being a little sketchier than I might have envisioned it.
So I quickly moved onto the egg tempera stage. I brought three pigments with me pre-ground into pastes: cadmium yellow medium, alizarin crimson and thalo blue, in addition of course to the egg yolk. In future, I plan to mix up my paints with egg in the studio before going out – just to minimize the hassle: there are already enough uncontrollable factors to contend with in nature, like the wind, rain, sun and insects, why shoot yourself in the foot? In any case, I mixed up my paints in situ and laid in some washes over my ink drawing to indicate future color developments.
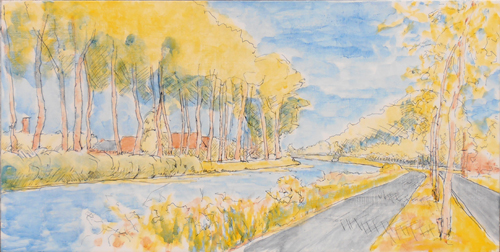
india ink and egg tempera underpainting of the Damse Vaart bend
Though it may not be very visible in the reproduction image here, I paid special attention to lay in more saturated colors in the foreground and lighter washes in the distance. I’ve learned from experience that it all makes a difference in the long run – any color, no matter how subtle equates to less light.
After a week or so, the egg tempera level was cured enough to paint over. It dries immediately but don’t be deceived, the egg/oil combo also has to cure. Gentle UV light can help. I painted a toned imprimatura of burnt sienna over the piece. My purpose in doing so was to unify the disparate foundational parts and lay in a preliminary value study. Using turpentine, I extracted the imprimatura from the highlights and lighter quarter tones revealing the underpainting beneath, while painting a more saturated layer into the shadows. I did this in the studio and it came out quite well(!). Now it’s starting to get exciting.
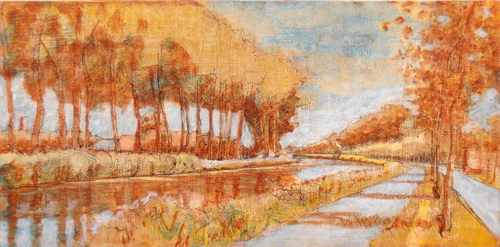
imprimatura, bend in the Damse Vaart
I let this level dry for almost a week. That’s not really necessary, at least if you don’t mind a little imprimatura bleeding into the next level of glaze, but since I did, I let it dry. Also, the shadowed areas were painted with a slightly heavier sienna wash, so they needed more time.
Finally, I set my field easel up in situ on a clear sunny day with a mild breeze. My homework was all done, the question was how far would I be able to bring the painting in one working session? I covered the whole panel with medium, wiped it back off leaving a slight tack to the panel surface and started in. Four hours later, I had the following result:
Level 1 oil, Bend of the Damse Vaart
I consider it an excellent start, though a little too coarse and graphic for my taste. I’d like to reintroduce the atmosphere of the imprimatura by softening a number of transitions and reintroducing the light. We’ll see if that’s possible. Fingers crossed for Bend in the Damse Vaart, part II.

