Creating a pochade Box for oils, version I (November 2023)
November 3, 2023
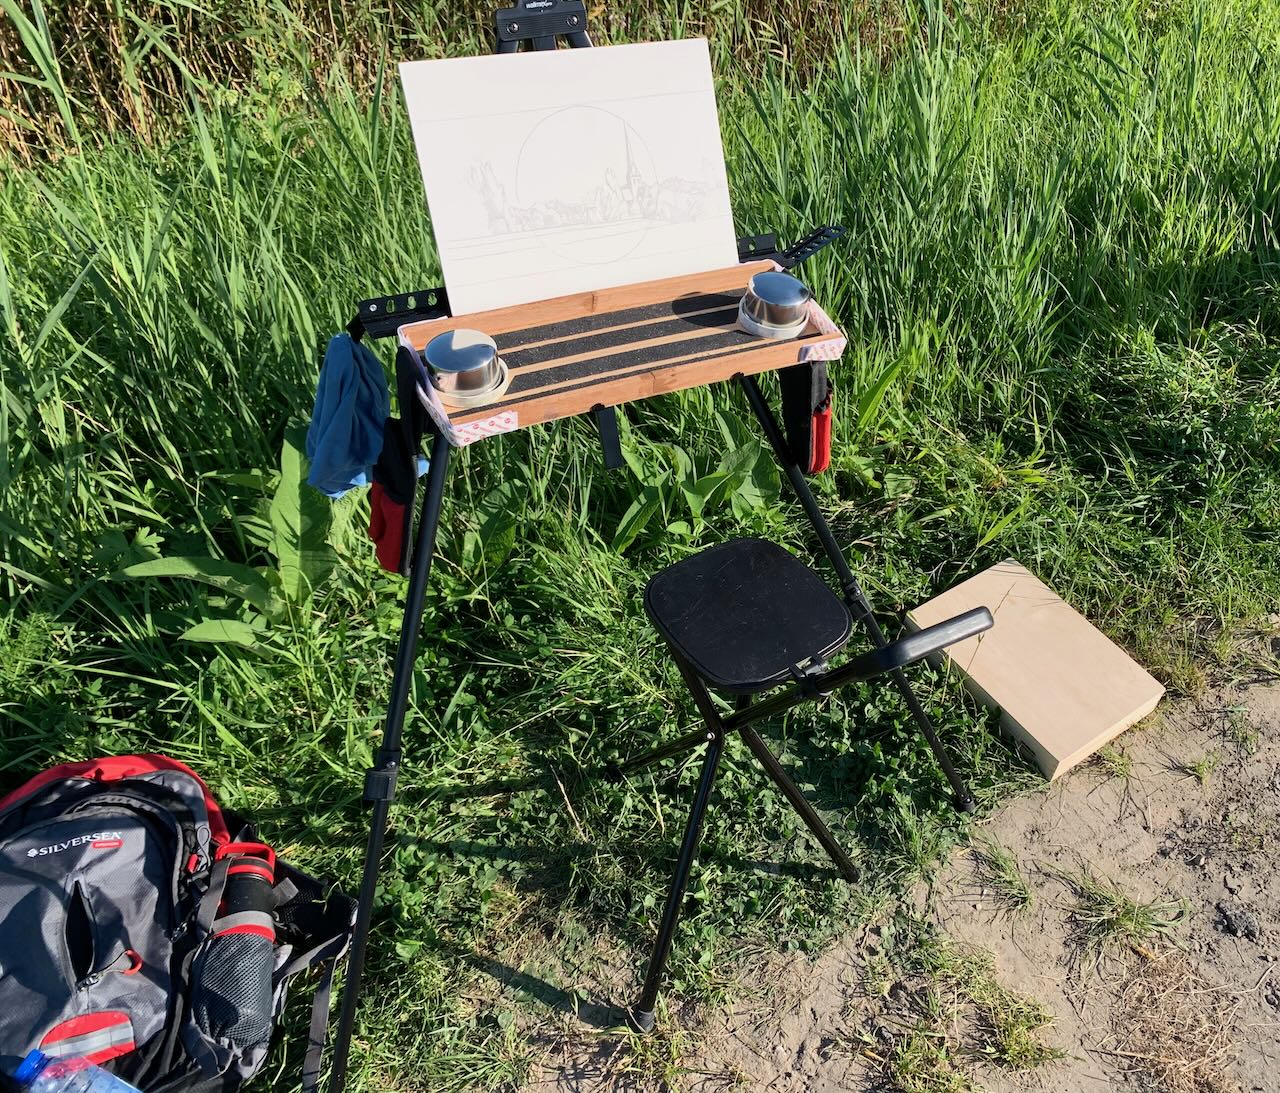
Last summer I began to return to en-plein-air painting in the environment around Bruges. At first, just watercolour. I would walk or bike to my location of choice. As my explorations expanded, my e-bike allowed me to get to remote locations, because my bags could easily hold all my stuff: a light weight field easel, a folding chair, a watercolor box, brushes and pad. No problem, though everything was kinda flimsy, makeshift and easily toppled over by the wind (or even me ;-)). 😉
Then I began to dream of doing oils (once again) yet in a similar fashion. I already had a beautiful Mabef wooden field easel but it weighed about 30 pounds and couldn’t be transported by e-bike. Primarily for that reason I had given up on my en plein air explorations. (I don’t drive a car much around Bruges, also because I have MS, I really can’t very walk far or stand for very long, but e-biking works). So maybe, just maybe, I could use the same condensed setup I now had for aquarelle and just substitute a (condensed) quantity of oil tubes, potions, palette and brushes instead? I already knew, the biggest plain-air challenge (besides the act of painting itself), was transporting a wet oil painting back home without smearing, so that was design challenge #1.
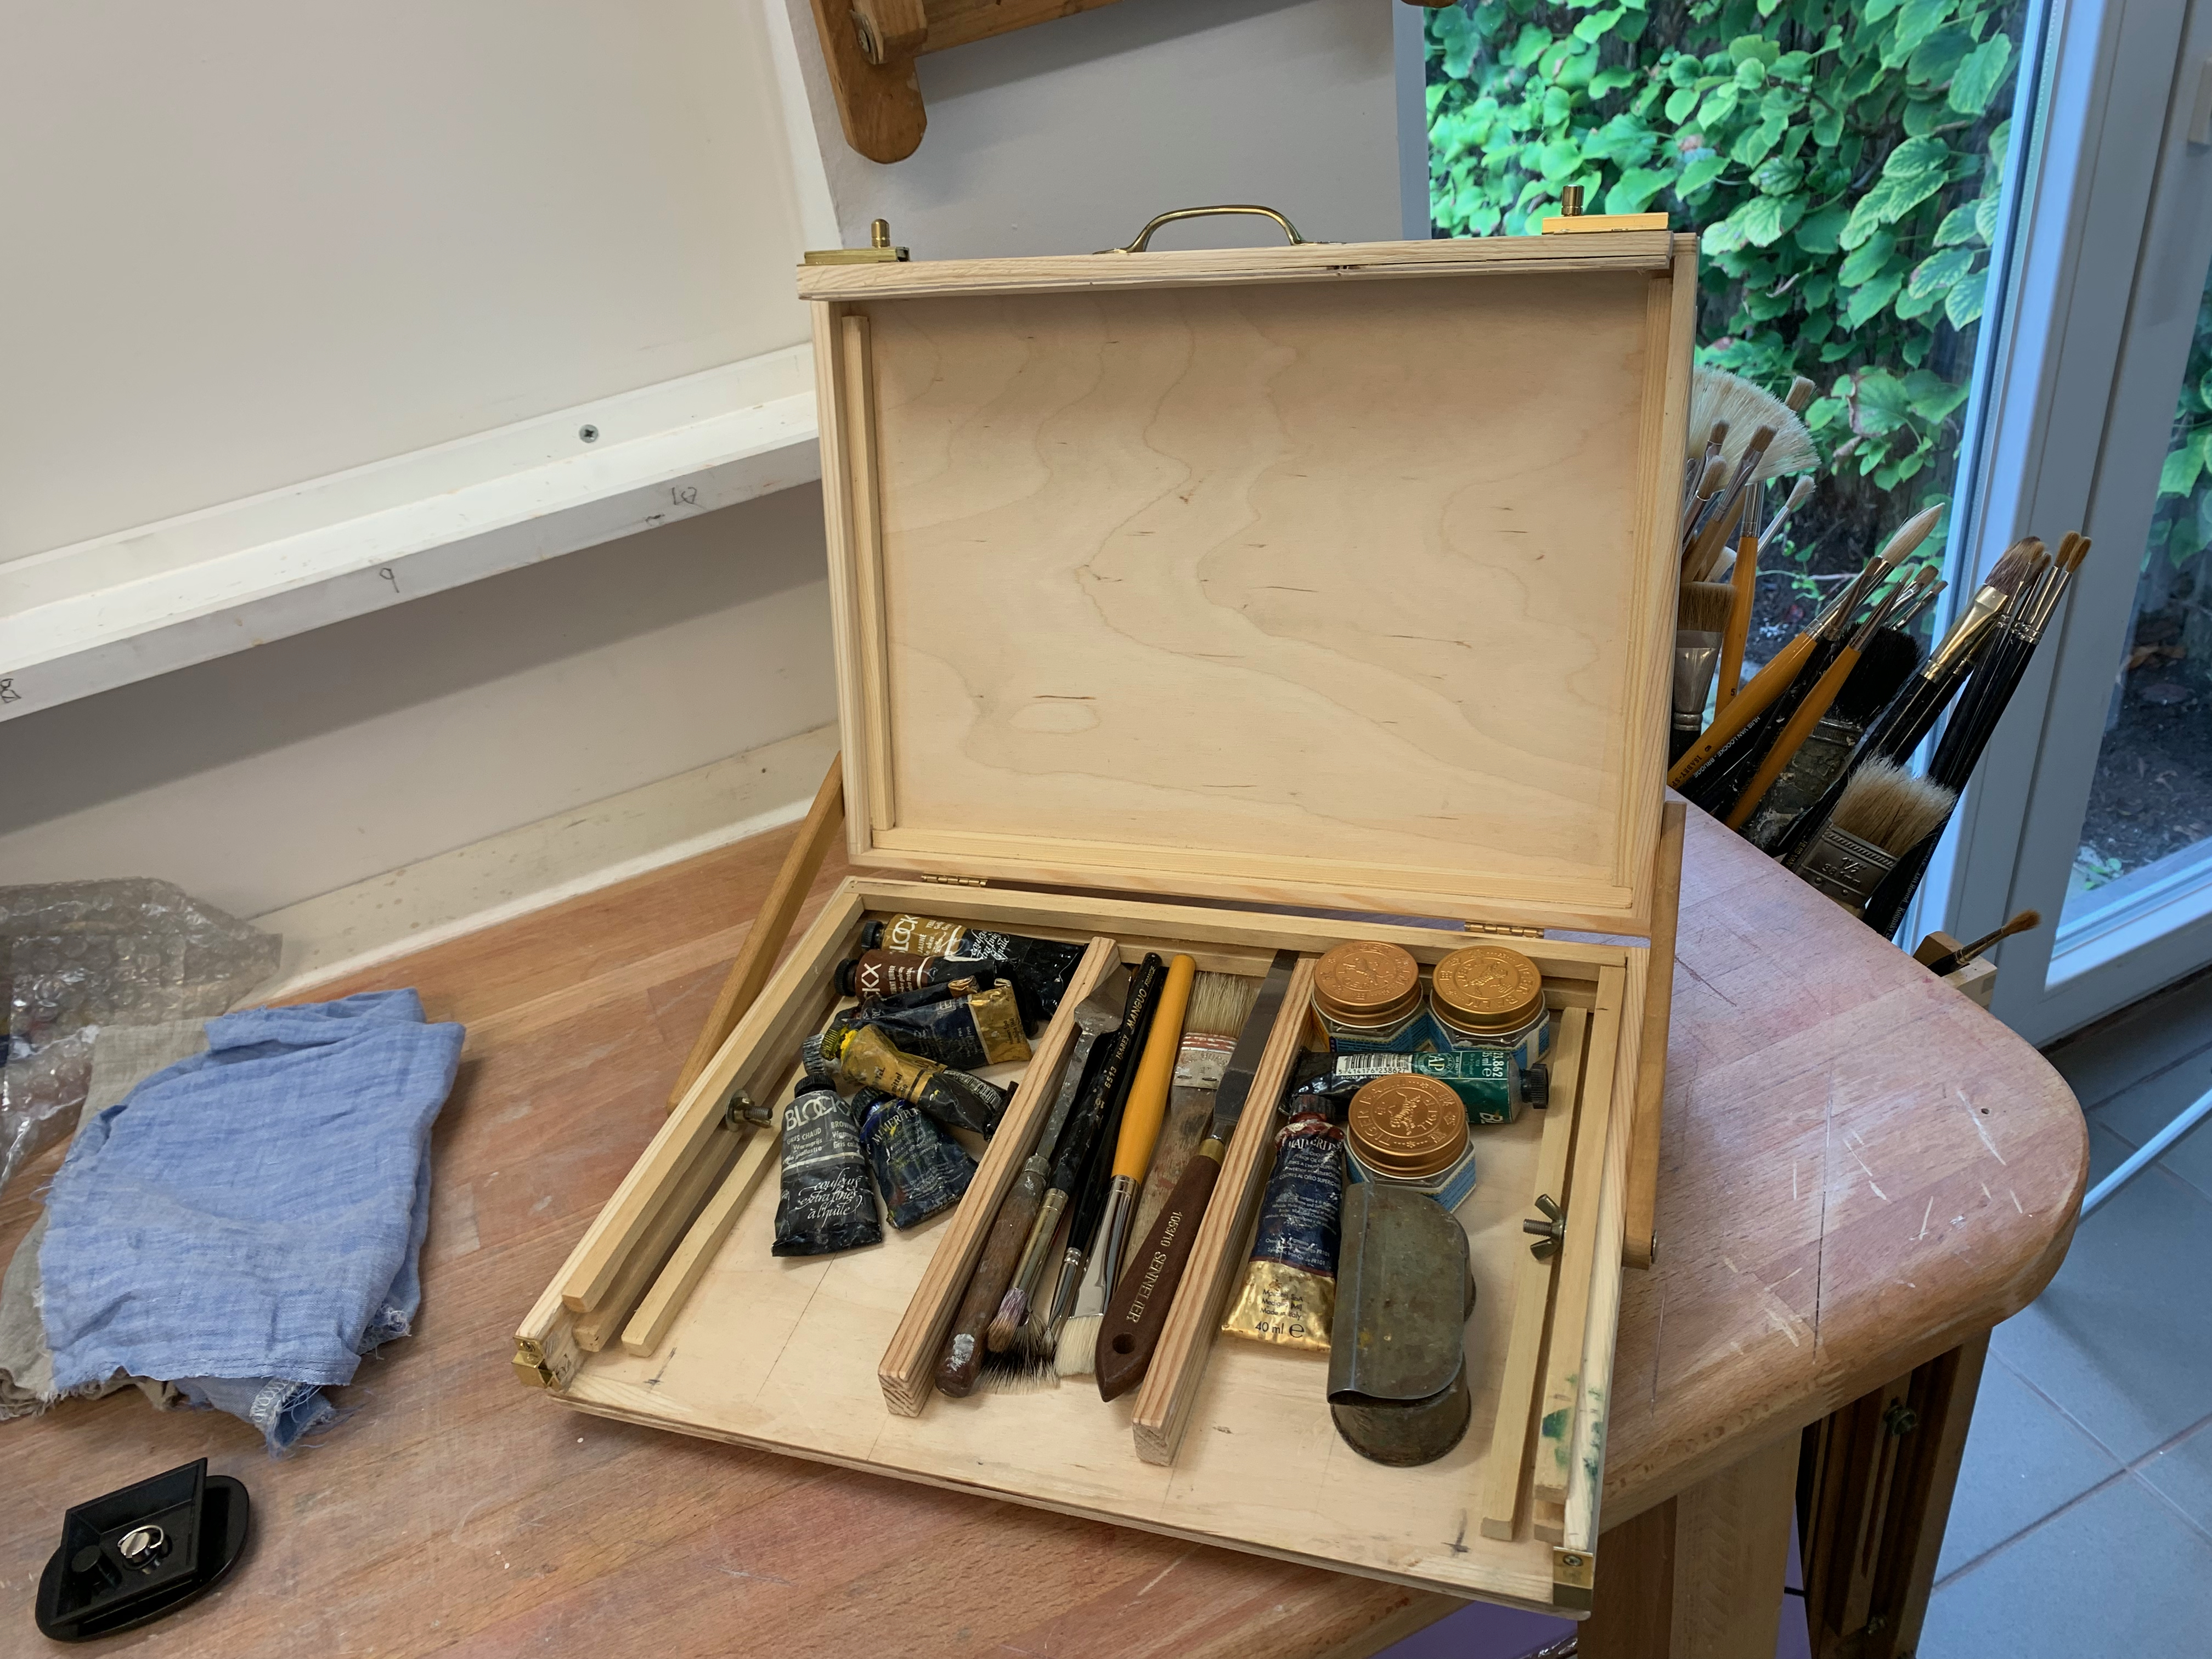
I bought an A4 (9 x 12 x 2″) wooden box on Amazon. The top section was 1/2″ deep while the bottom section was 1 1/2″ deep. I cut a slice out of the front along the bottom section and glued that insert to the top lid. This would could potentially nest a wet gessoed panel. I then glued thin runners inside along the sides of the bottom section. This created a box, allowing my thin gessoed panels (and palette) to seamlessly slide in and out, keeping everything from smearing, while storing tubes and brushes beneath. The lid could close and everything remained in place. My first foray with this system worked out fine. Nothing smeared (though my metallic field easel proved far too flimsy to function as an easel).
I began to dream of further improvements. Could I use the upper section of the box itself as a field easel? How to mount it? And to what? When attached, how to tilt the lid to provide a stable angle for painting? Would I then be able to carry my paints, palette and brushes in the bottom section of the box? If so, could I still keep one painting protected during transport? And what about carrying a wet palette, would that be possible? Above all I wanted to design an elegant, simple solution which could minimise the amount of gear I had to carry.
The Tripod and Mount
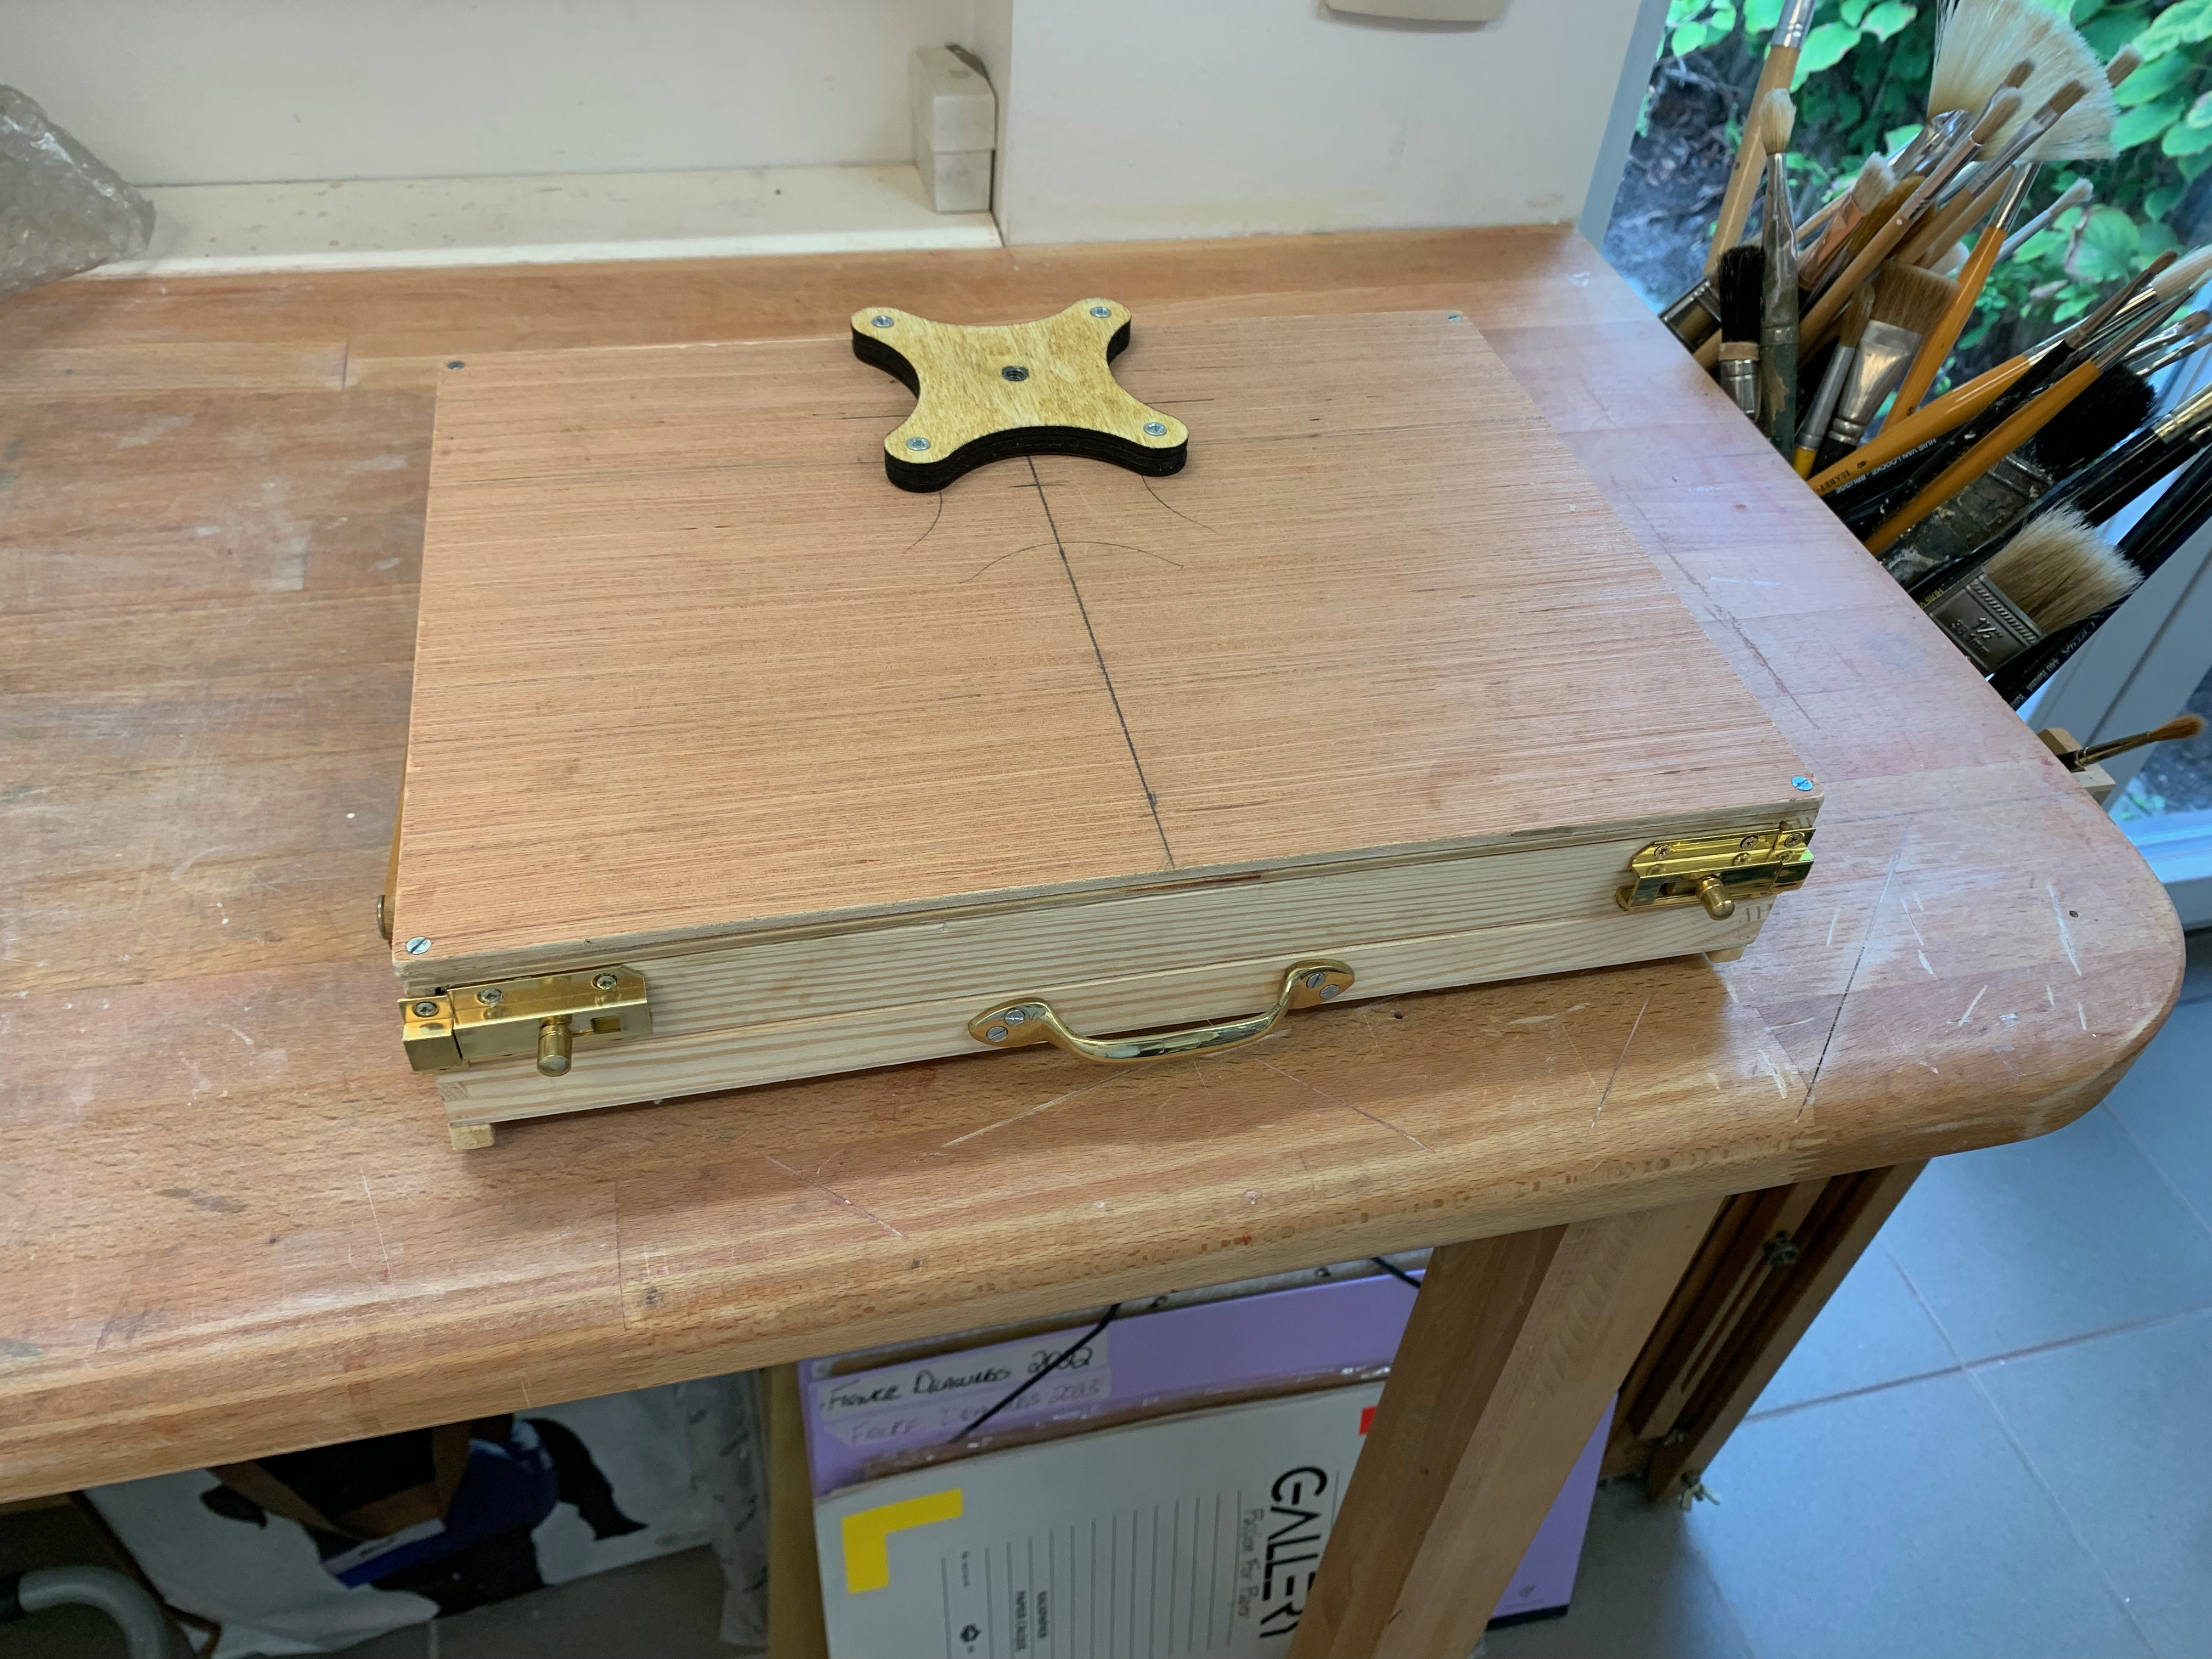
After some surfing around I determined that a standard camera tripod is fully adequate to function as an easel. It has a detachable mounting plate with a projecting 1/4″ bolt, consisting of 20 threads. You just need to match that plate to a bracket able to receive the bolt, affixed to the underside of your box. For starters I bought a tripod from a local appliance store. Then I looked around and sourced a beautiful bracket from Jackson’s Art Supply in England. Affixed to the box’s underside, it can take that 1/4″ 20 thread bolt. I just needed to laminate an extra piece of 1/4″ plywood to stabilize the base.
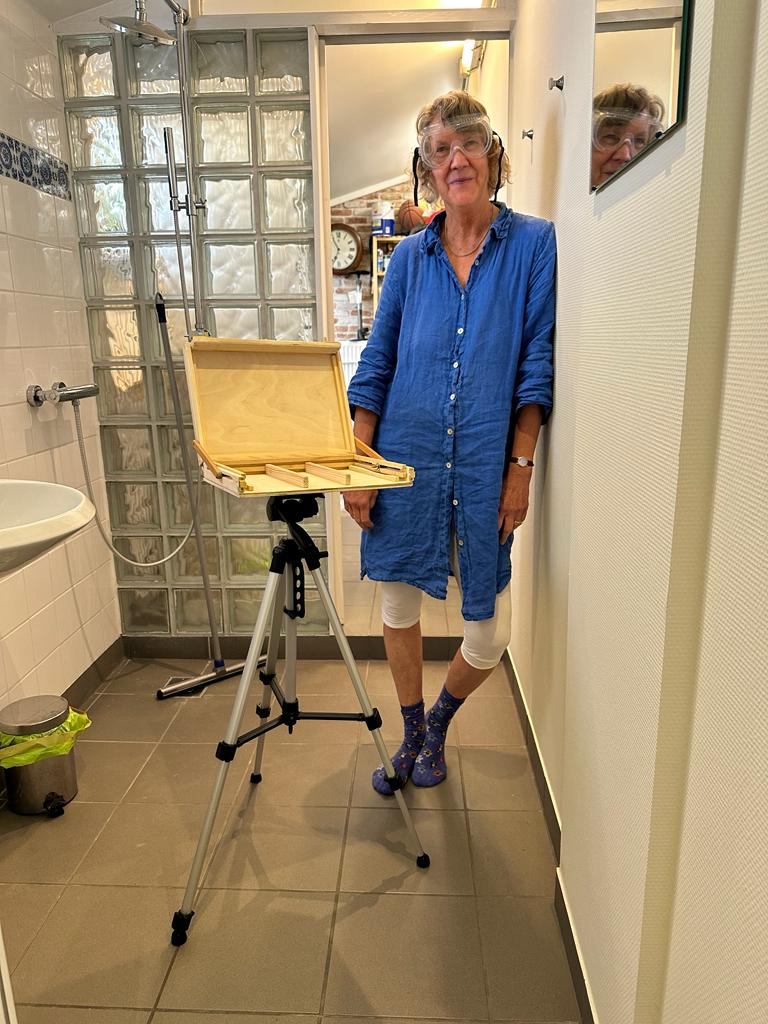
In the end I had something like this, ready for a test drive. But by now it was the beginning of November, end of the painting season. That all important test drive would have to wait for the spring.


May 22, 2025 at 12:30 am
[…] already created a few pochade boxes for oil painting and written about there here and here. But late last summer I began to see the utility of creating a similar set-up exclusively […]
May 22, 2025 at 1:18 am
[…] creating a pochade box for my studio in Belgium, I wanted to create a duplicate version for my studio in California. While attending a course […]
May 22, 2025 at 1:29 am
[…] weather (or lack of it). Secondly, because I’ve been navigating various tweaks to my newly self-designed and self-created pochade box. For example, at the start of session #2, the bracket attaching the box to my tripod fell off. 😦 […]