Bend in the Damse Vaart
August 30, 2013
I posted a WIP (work-in-progress) about a month ago. Yesterday I completed the last glaze on that project so here’s the final result. I’m quite happy with it, as there were a number of technical challenges.
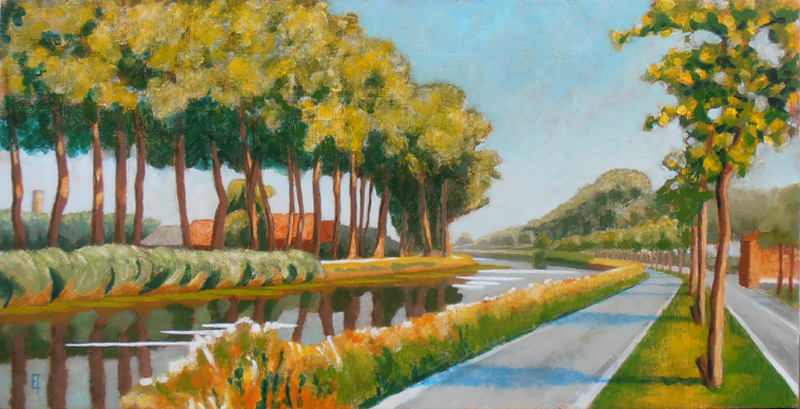
Bend in the Damse Vaart, Oil on panel. August 2013.
The first challenge was the light. I felt that the previous en-plein-air painting session (see WIP) had been quite successful but that I had lost the light statement which had been so apparent in the imprimatura. I decided on major surgery. I extracted the paint from the highlight areas (using medium instead of turpentine because it’s a softer method of extraction of fresh paint and you can paint back into it quickly and easily). Then I reintroduced light via a fast drying tempera white (zinc white mixed with emulsion). The resulting impression was a bit like a coarse blanket of snow(!).
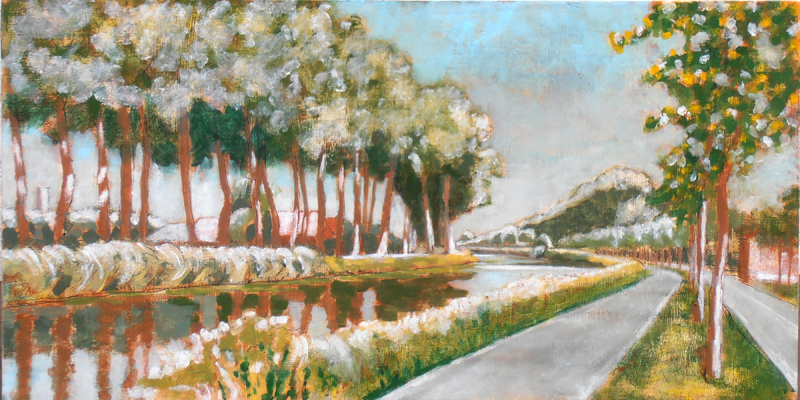
Snow on the Damse Vaart…
The second challenge was what’s called a sunken-in painting surface. What’s that, you might ask? Well, as the en-plein-air painting session dried, I noticed that many areas of the painted surface had become dull and gray instead of luminous and light. (Yuk!) This can occur when the chalk gesso ground is too thirsty and absorbs paint too quickly. Luckily this can be remedied by a light coat of retouch varnish, which I did and it was. So now the painting had been resuscitated but it was defo an ugly duckling: functional but with an unpleasant tactile quality.
I decided to complete the project in the studio, since technically there were too many balls to juggle. I kept with the same minimal palette that I had used en-plein-air: cadmium yellow, alizarine crimson and thalo blue – mixing any color I needed from these three with the addition of lead white and warm gray for my tints and shades. I started by glazing and painting the left bank only. I hate working this way since the development isn’t global but there wasn’t a way around it (that I could see). After the first studio session I had the image below:
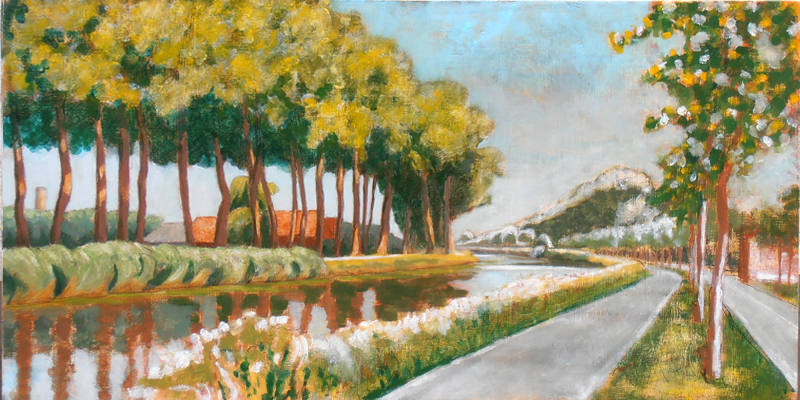
Rive gauche
Now the painting was starting come alive and I was in love (really!). When this begins to happen it’s very important to listen to what the painting is saying instead of imposing any extraneous ideas upon it. For example, working en-plein-air at this point would be counter-productive. The hard part was waiting the few days it took for the glaze to dry enough so as to work on the adjacent area. When it was, the challenge was simply in staying true to the developments of the other side. See image here below:
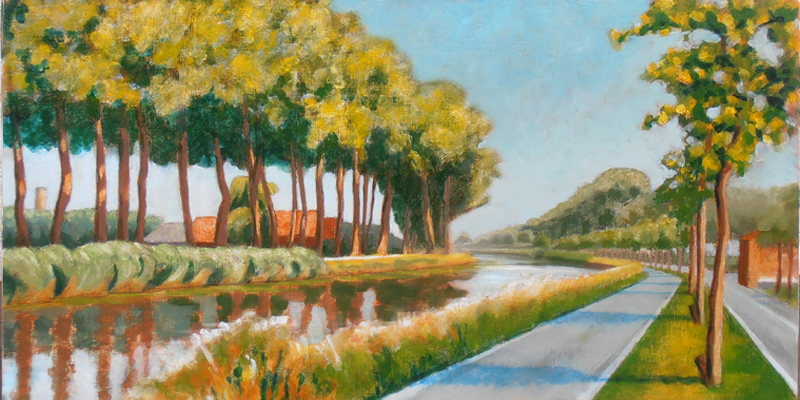
Rive droit
So then again, after the appropriate drying time, the final step was more of a follow through than a creation: mirroring the development of the painting in the water’s reflections while attempting to give it a sense of wind-life. (See the initial image above)
Now, on to the next…


September 19, 2013 at 9:03 pm
Wow Ellen that is quite a process – absolutely beautiful and very rich result!
September 20, 2013 at 5:31 am
Thanks, L. 🙂
August 10, 2015 at 1:07 pm
[…] Oil on panel. August 2013. 30 x 60 cm. or 11 3/4 x 23 1/2 inches. You can read about the technical work-up of this piece here. […]
August 24, 2015 at 2:00 pm
[…] neighboring areas of paint have been worked-up. And adding it back at the finish line (like I did here) is OK but you can’t always guarantee that the surface will accept it by then or that the […]